Looking for your apps? Click the account icon in the upper right corner of the page.
Receiver configuration through a web Interface
The GNSS receiver has an on-board web UI for configuration and management. You can get access to the receiver with Wi-Fi-enabled devices. The receiver has menus to configure settings, monitor satellites, and manage receiver functions.
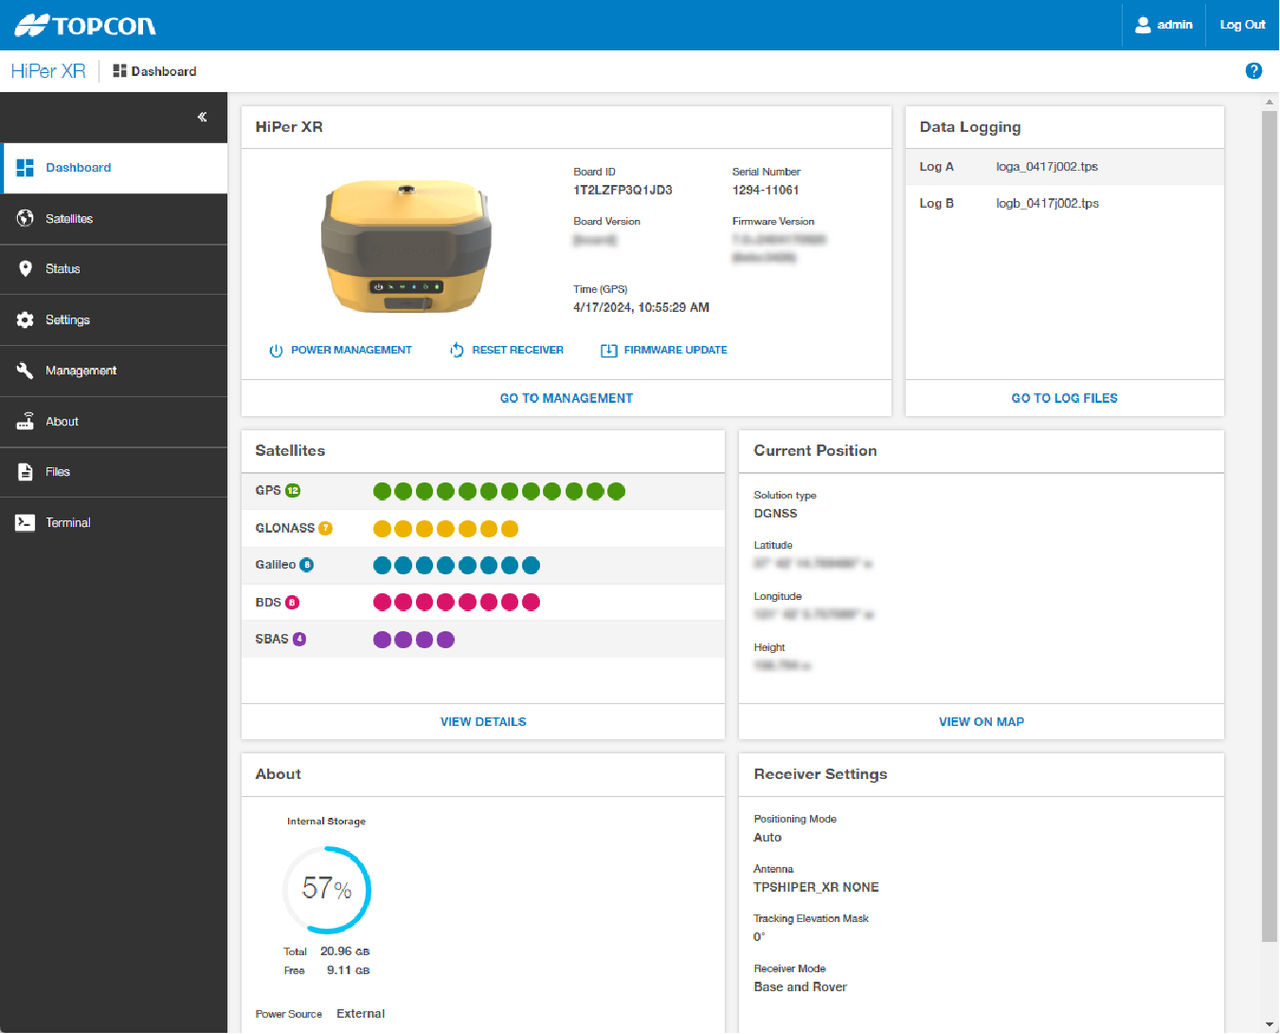
The HiPer XR GNSS receiver has an on-board web user interface (UI) that can work with field controllers, computers, tablets, and/or other smart devices with Wi-Fi network functions. After a connection between the receiver and the device is made with a web browser, enter the IP address of the receiver (default IP address is: http://192.168.4.1.) and log on. Access to the on-board web UI becomes available.Figure: Web UI Dashboard
Use the web UI to configure the receiver settings. The menus that follow are available for receiver configuration:
Dashboard – the primary console with an overview of the receiver condition, tracked satellites, location, altitude, current firmware, receiver board ID and serial number, memory capacity, log files and more.
Satellite menu – shows the list of the satellites and constellations with satellites parameters. The satellite parameters shown are satellite elevation, azimuth, signal-to-noise ratios, and tracking times. Use the Settings menu to change monitored and used satellite signals.
Status menu – shows specified information about the receiver’s position, data links, position in time, a skyplot, scatter plot and spectrum analyzer.
Settings menu – gives the ability to change the receiver parameters. It has these submenus:
Positioning – to change the positioning mode, parameters for satellite observation, and enable solutions.
Base – to configure a reference base station. RTK - to set up the RTK rover.
Satellites – to adjust which satellites are used by the tracking and positioning calculation.
Ports – shows the available receiver ports and enables input and output customization.
Bluetooth – to get access to and change the LongLink, client, and BLE parameters.
Network – to configure and manage the Wi-Fi module and configure TCP/IP settings.
Radio Modem – to change radio modem settings.
Cell Modem – to see the condition of the cell modem, configure the cell modem, and tell the modem to connect to a GSM Network or another cell modem.
NTRIP – to configure NTRIP functionality and review caster statistics.
Management – to update the GNSS receiver firmware, load option authorization files (OAF), import/export receiver settings, and reset the device.
About – gives information about the currently connected receiver, it’s related hardware and firmware versions, battery conditions, and more.
Files – gives access to the folders and files saved in the receiver’s memory, download, and customization of the recorded message sets for data logging.