Pair wireless display and MC-X (tablet hotspot)
Use this procedure to pair 3D-MC to the MC-X.
Note: How are Pair and Connect different? Communication between the MC-X and a wireless tablet uses pairing to enable subsequent connections between MC-X and the tablet. Pair to Machine starts the pairing process and is necessary if the tablet is used with another machine. Connect to Machine uses your saved login credentials to connect to the machine. (If this process fails, it is necessary to Pair to Machine again.)
- First connection - 3D-MC tells you to do the pairing first. This task creates a known connection between the MC-X and the tablet. It is necessary to complete the onscreen instructions to complete the pairing.
- Subsequent connections - These are automatic after a satisfactory pairing, and occur when the paired tablet and MC-X are online. Active communication occurs between a paired tablet and MC-X. If an automatic connection is unsatisfactory, the system shows the two options again.
If a different tablet uses the MC-X, this also shows when the auto-pairing process starts: Warning: The MC-X1 is already connected to a different CT8X2. Would you like to reconfigure? If you select Yes, the system starts the process to pair to machine, and disconnects the currently connected tablet.
- Proceed based on the wireless tablet:
- On the CT8X2, go to the Network and Internet settings
- On the GX-10W, go to Other Wireless Connections
- Make sure that Bluetooth, Hotspot, and Location are enabled. This is necessary for the system to connect correctly. DO NOT enable the Wi-Fi. ADDITIONAL INFORMATION:
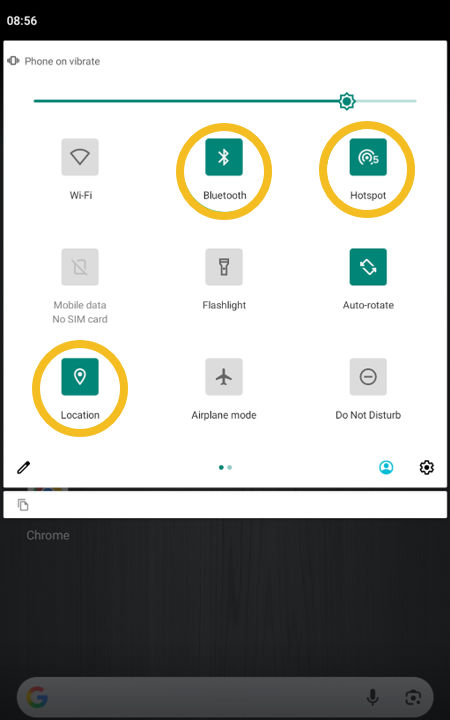
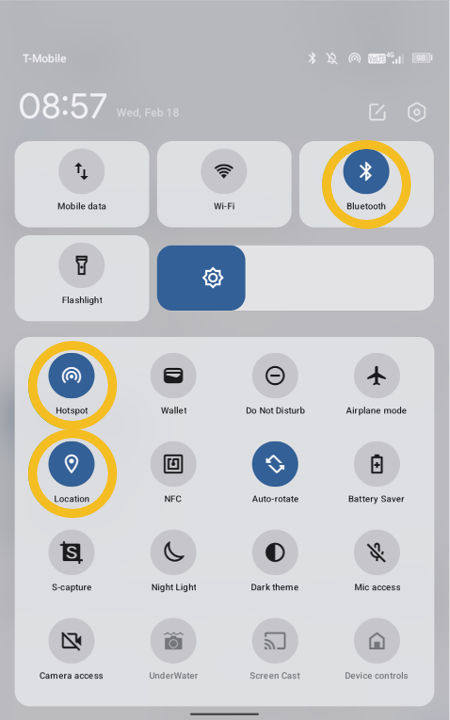
- Make sure that the Wi-Fi shows as Off.
- Select Hotspot & tethering to show the Hotspot Settings menu.ADDITIONAL INFORMATION:
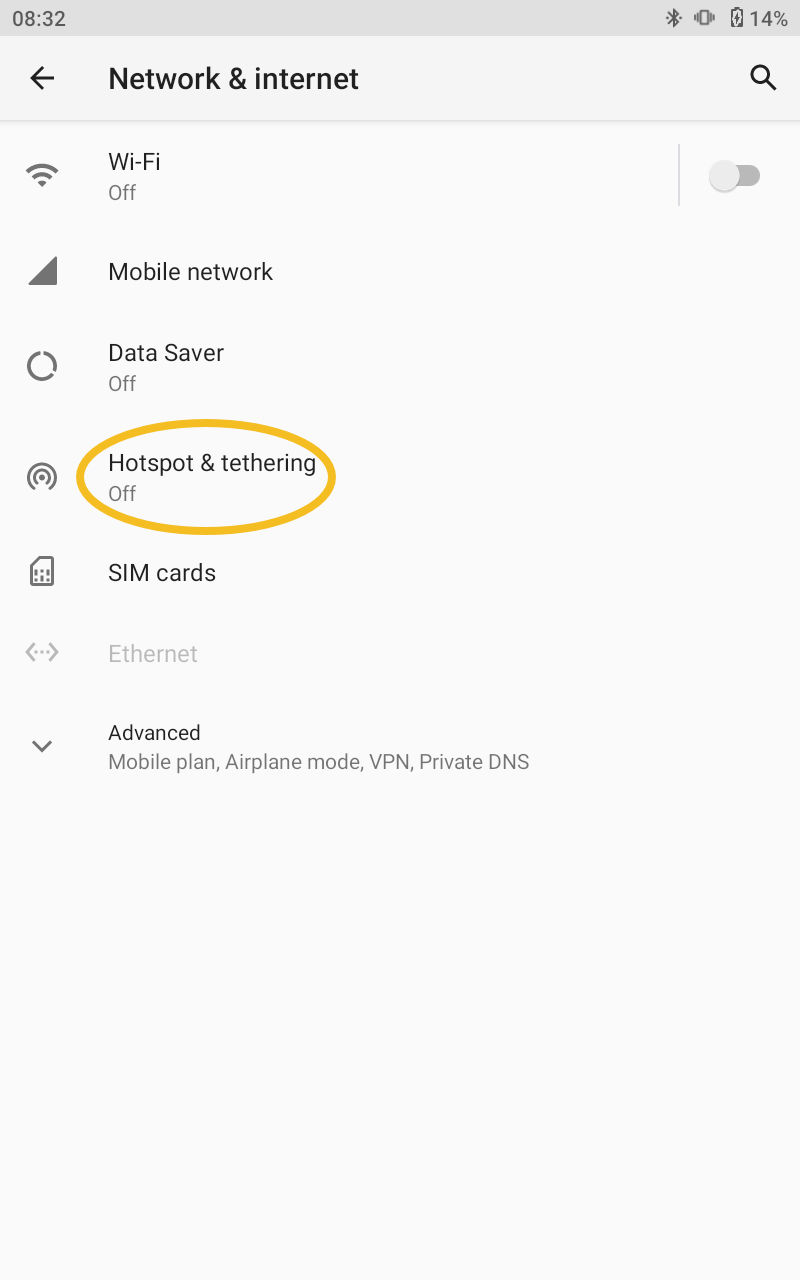
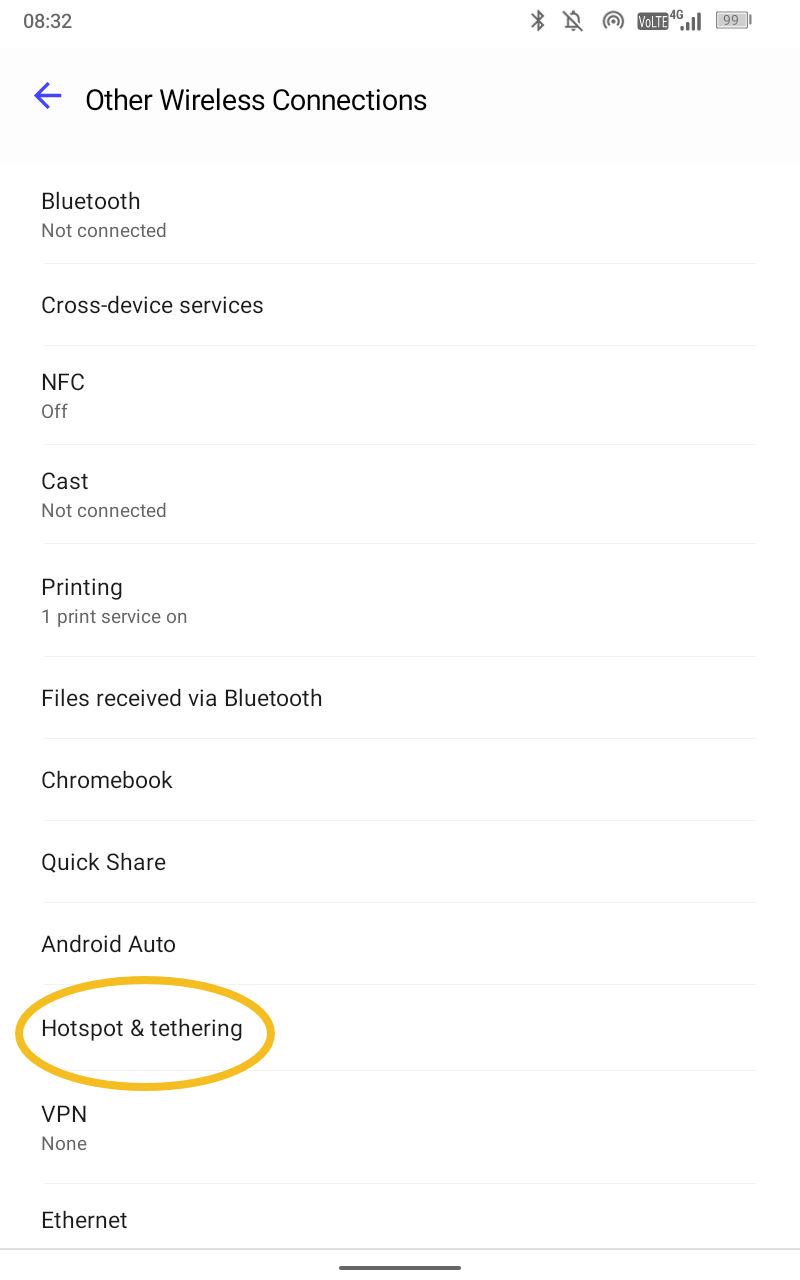
- Select Wi-Fi Hotspot.
- Make sure that Wi-Fi Hotspot is ON. The slider bar/dot are in color when the hotspot is on.ADDITIONAL INFORMATION:
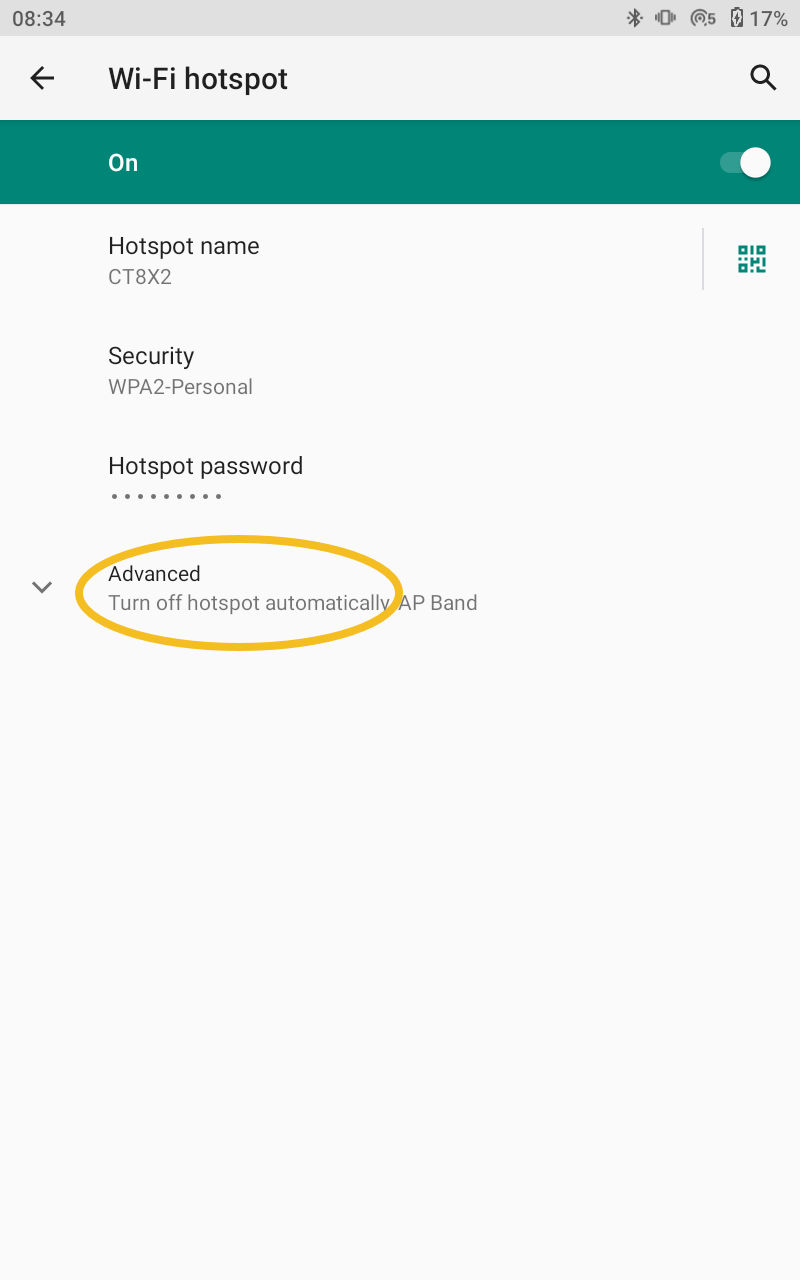
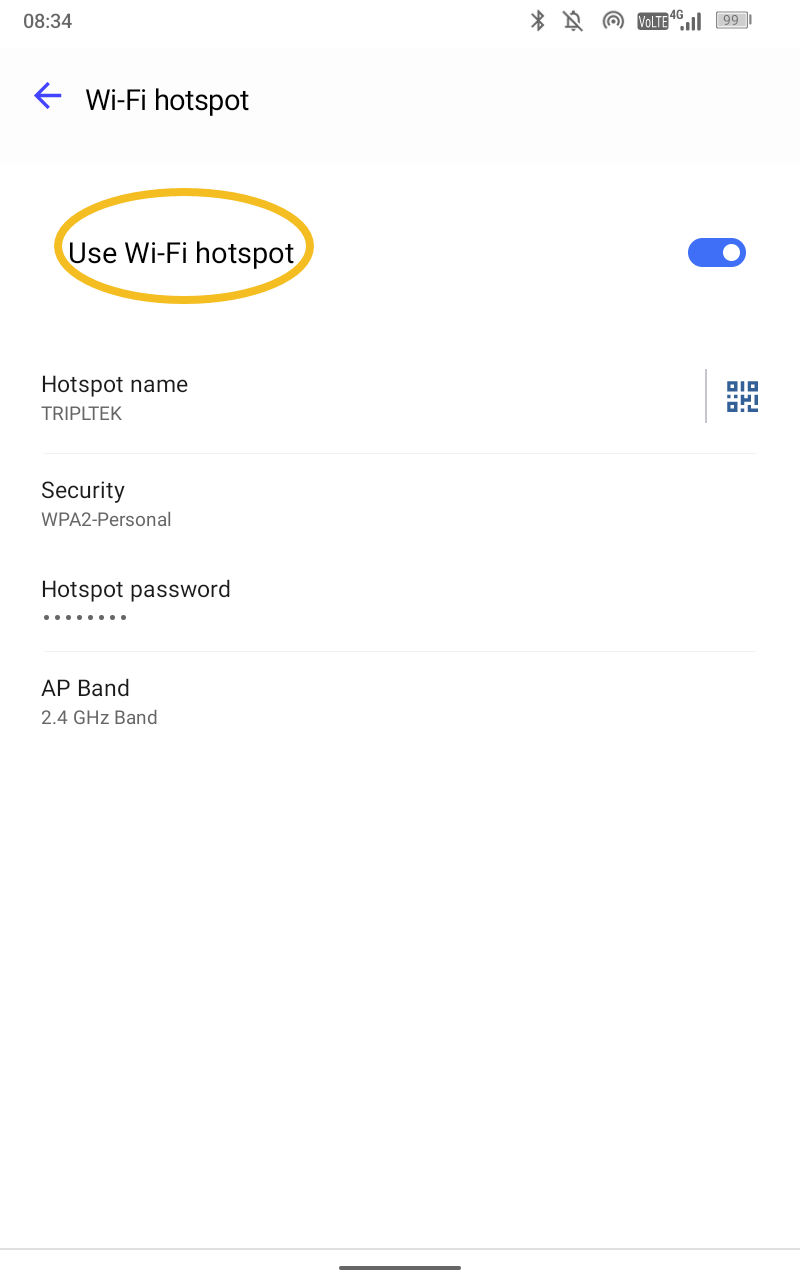
- Enter the Hotspot password.
- Record the hotspot name and password. This information is necessary to connect to the machine in 3D-MC.
- Select Done. The wireless display can communicate with the MC-X1 at this time.
- Only if using the CT8x2: Select Advanced and make sure that Turn off hotspot automatically is disabled. DO NOT change the AP Band from 2.4 GHz to 5GHz. This will cause a failure to connect.
- Go back to the main screen on the wireless tablet.
- Open 3D-MC.
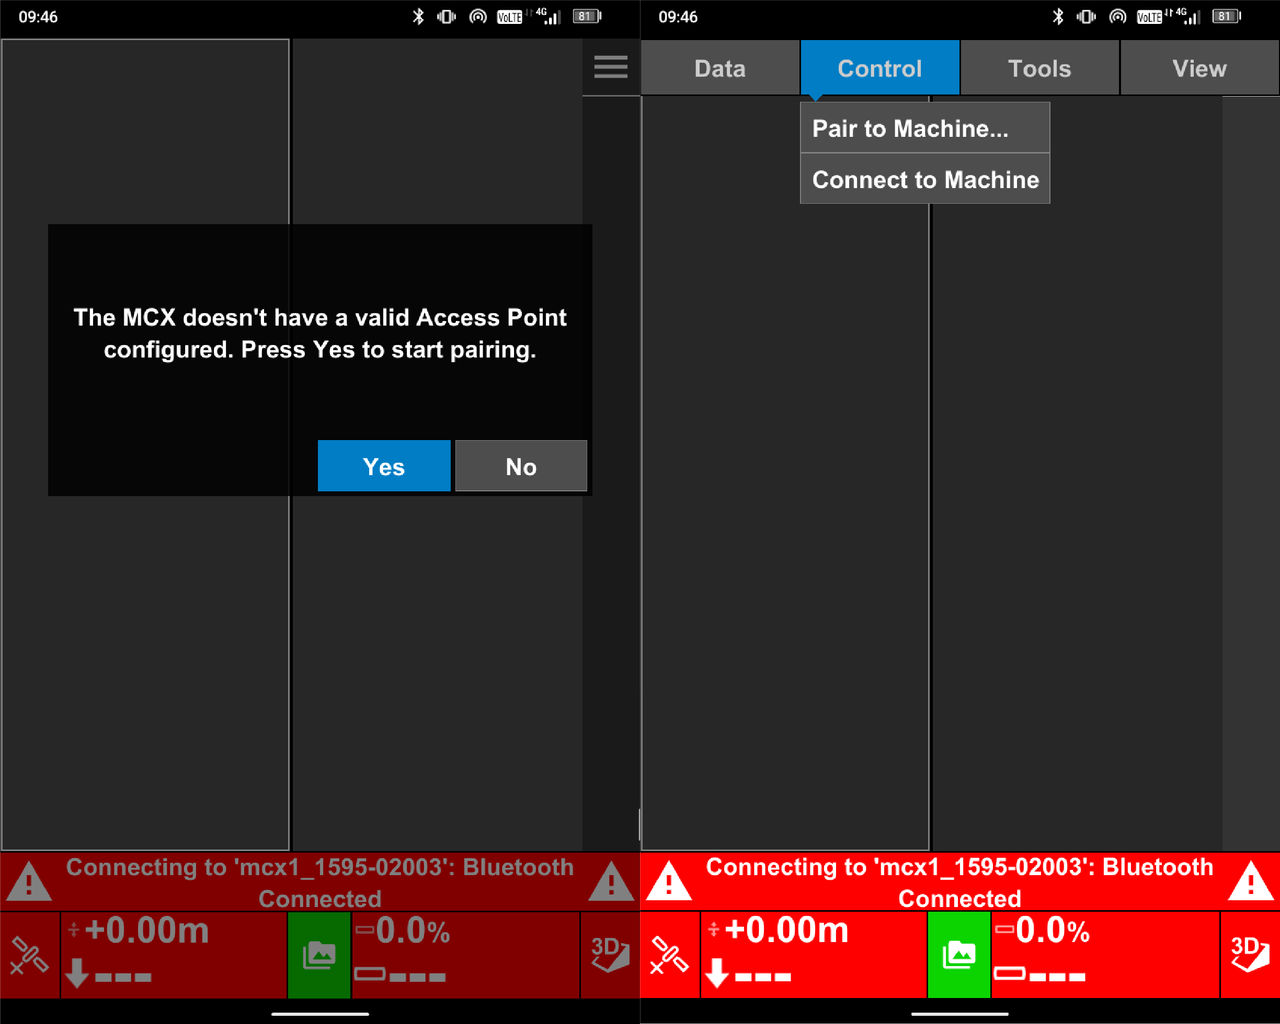
- Select Yes at the prompt or select Pair to Machine from the Control drop-down menu.ADDITIONAL INFORMATION:
- Select the MC-X1 from the Device list. (If the device does not show, select Refresh.) ADDITIONAL INFORMATION:
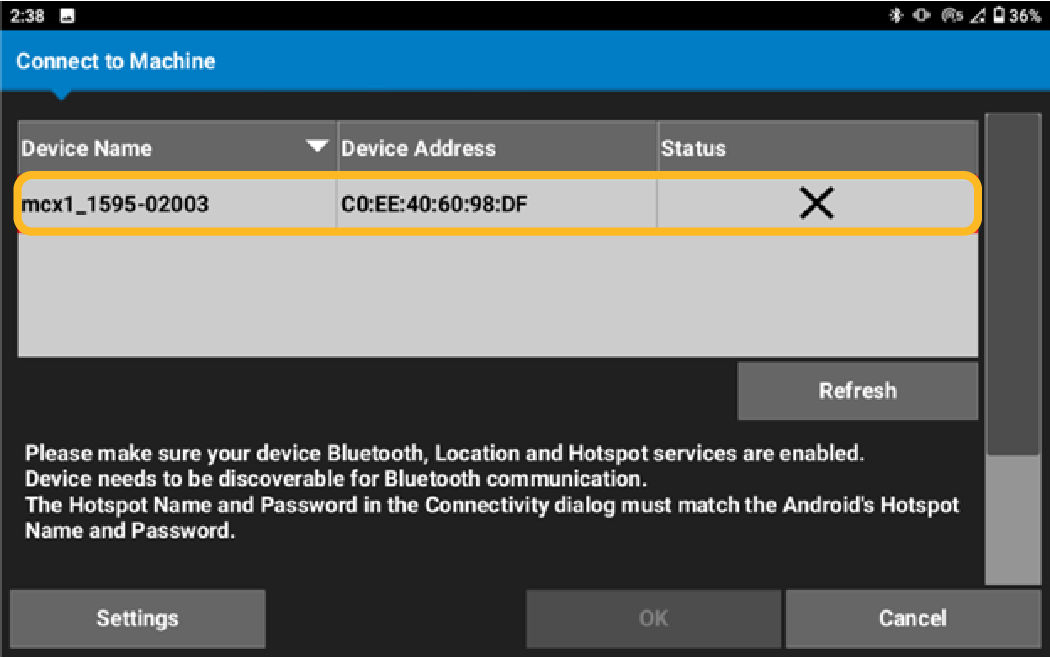 Bluetooth Connected shows after the wireless tablet makes a Bluetooth connection with the MC-X1.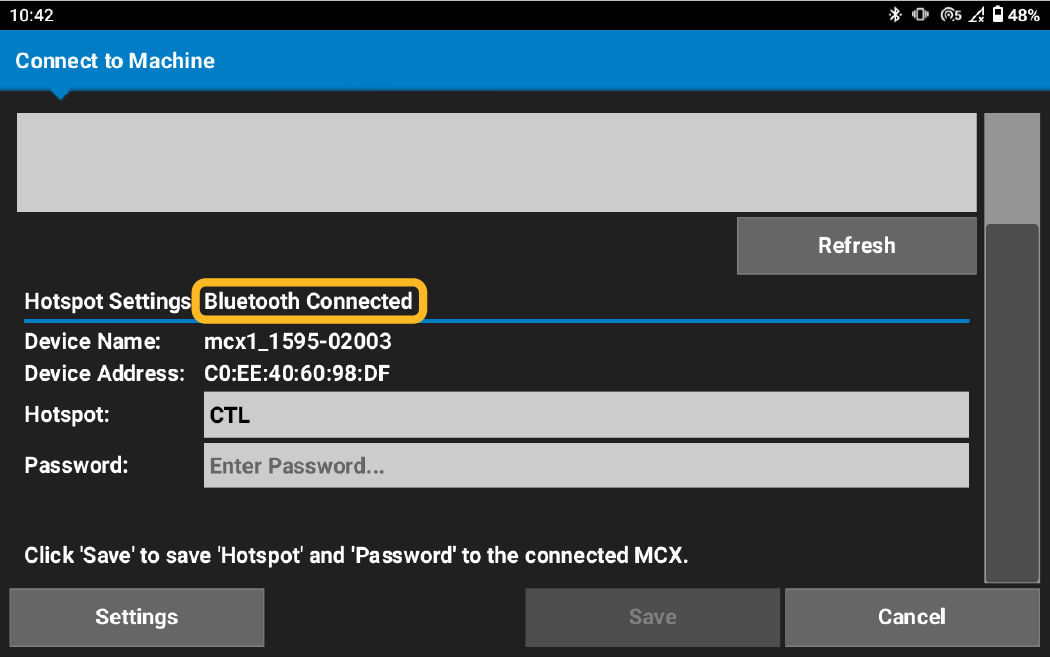
- Enter the wireless tablet Hotspot and Password.
- Select Save.ADDITIONAL INFORMATION:
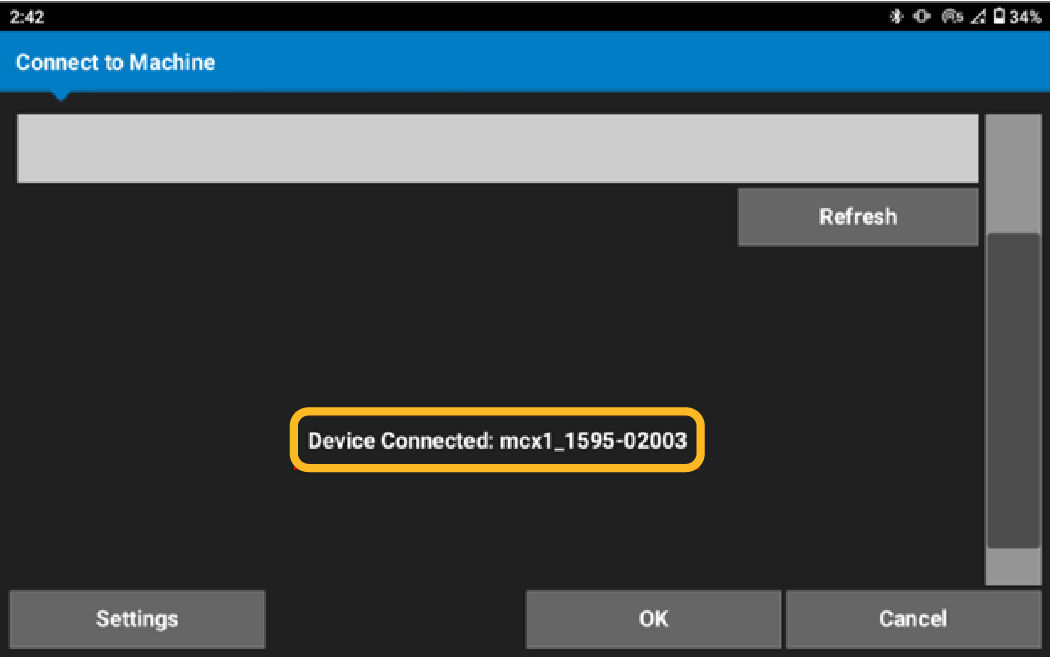
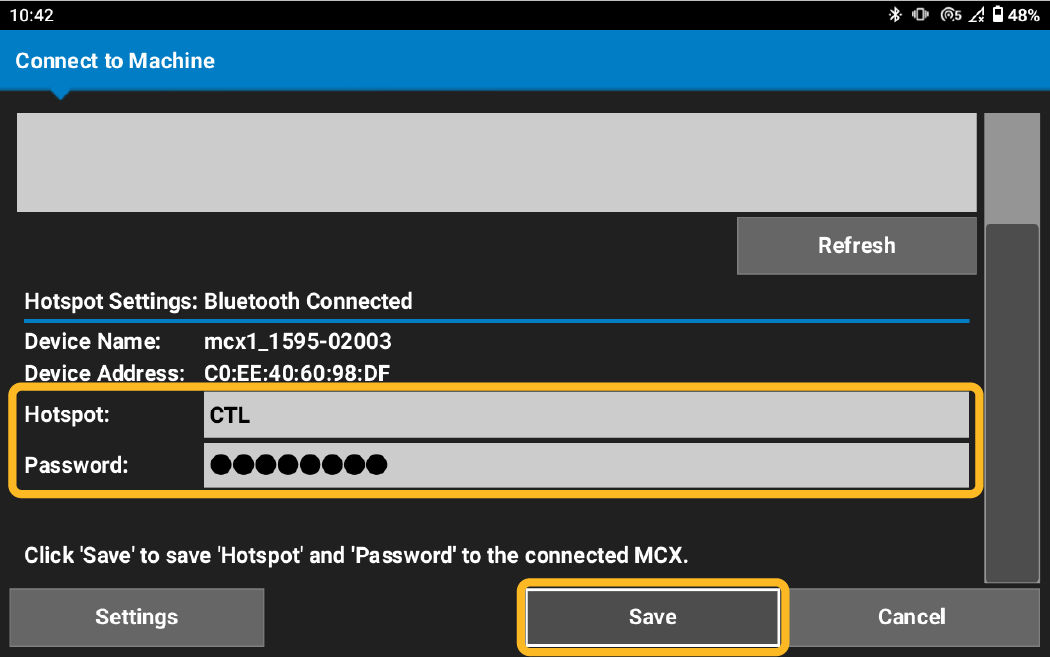 Device Connected shows with the associated MC-X1 name after the hotspot information is saved to the MC-X1. If the device does not make a connection, make sure that the hotspot on the wireless tablet is enabled.
 - Select OK.ADDITIONAL INFORMATION:The wireless tablet and the MC-X1 are paired. The system automatically pairs the wireless tablet and the MC-X1 on startup when you select Yes at the Confirm Connection prompt.
- Select Tools and enable Supervisor mode.
- Select MCX Configuration.
- For a wireless hotspot connection and the MCX Configuration tab in 3D-MC: The login window shows. See Step #20.
- For a wired direct connection or the Wi-Fi method: Open a web browser and enter 192.168.0.1 to connect to MCWEB. See Step #20.
- Enter your login credentials.
Next:
Update MC-X firmware
myTopcon NOW! support
Take your Topcon experience to the next level with myTopcon NOW! This platform is a self-service tool for your desktop or mobile device.