- Put the machine in a location and condition in which to record the machine operation.
- Enter Supervisor mode.
- Select to open the Diagnostics screen.ADDITIONAL INFORMATION:
Figure: Diagnostics path 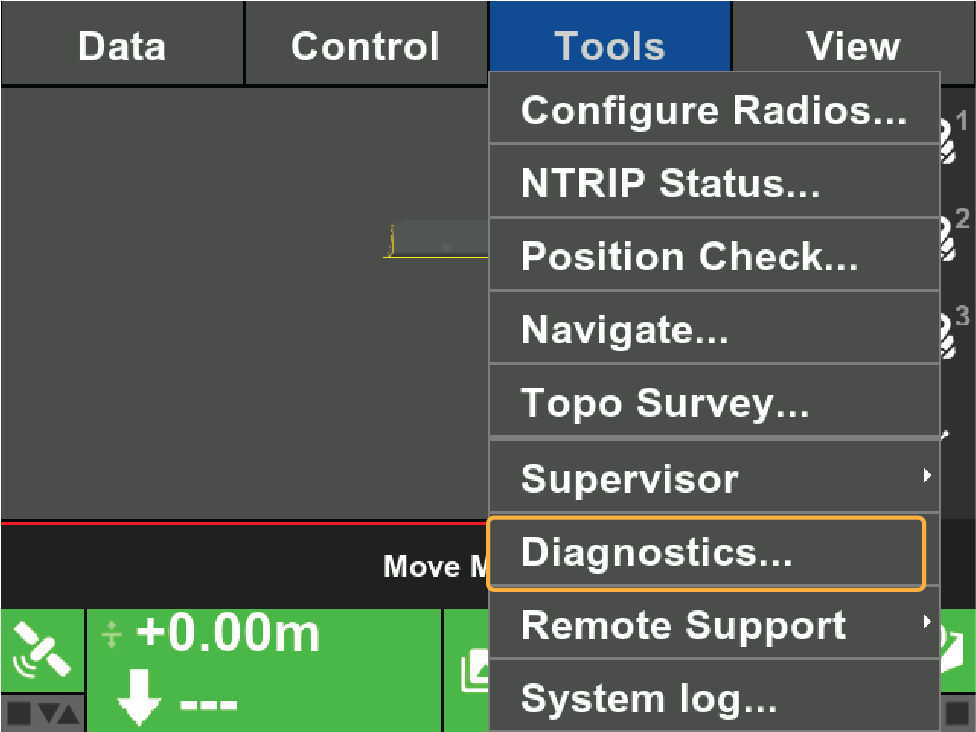
- Select theMCX Logging tab.
- Make sure that Save dozer outputs, large shows in the Group column and
 shows in the Enable column.ADDITIONAL INFORMATION:
Figure: MCX Logging tab 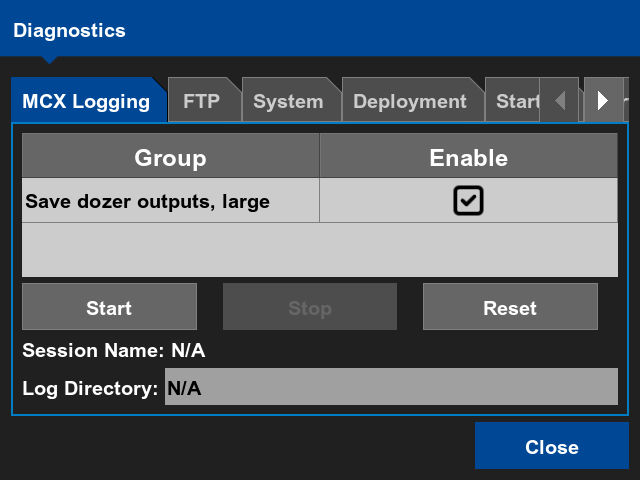
- Select Start.ADDITIONAL INFORMATION:The Logging Name dialog opens.
- Enter a name for the log file, then select OK.ADDITIONAL INFORMATION:
Figure: Logging Name 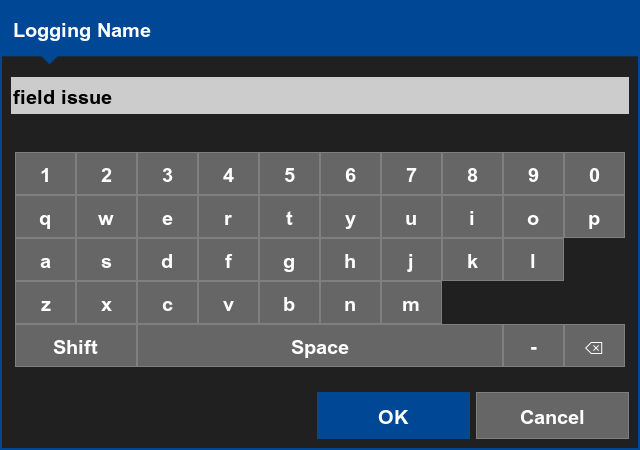 The logging process starts. Complete the necessary operations on the machine to record for analysis.Note:If necessary, you can close the Diagnostics screen during the logging process.
 - After the machine operation is complete, select , then select Stop.
- Select the FTP tab.ADDITIONAL INFORMATION:The new log file shows.
- Highlight the log file and select Download.ADDITIONAL INFORMATION:
Figure: FTP tab 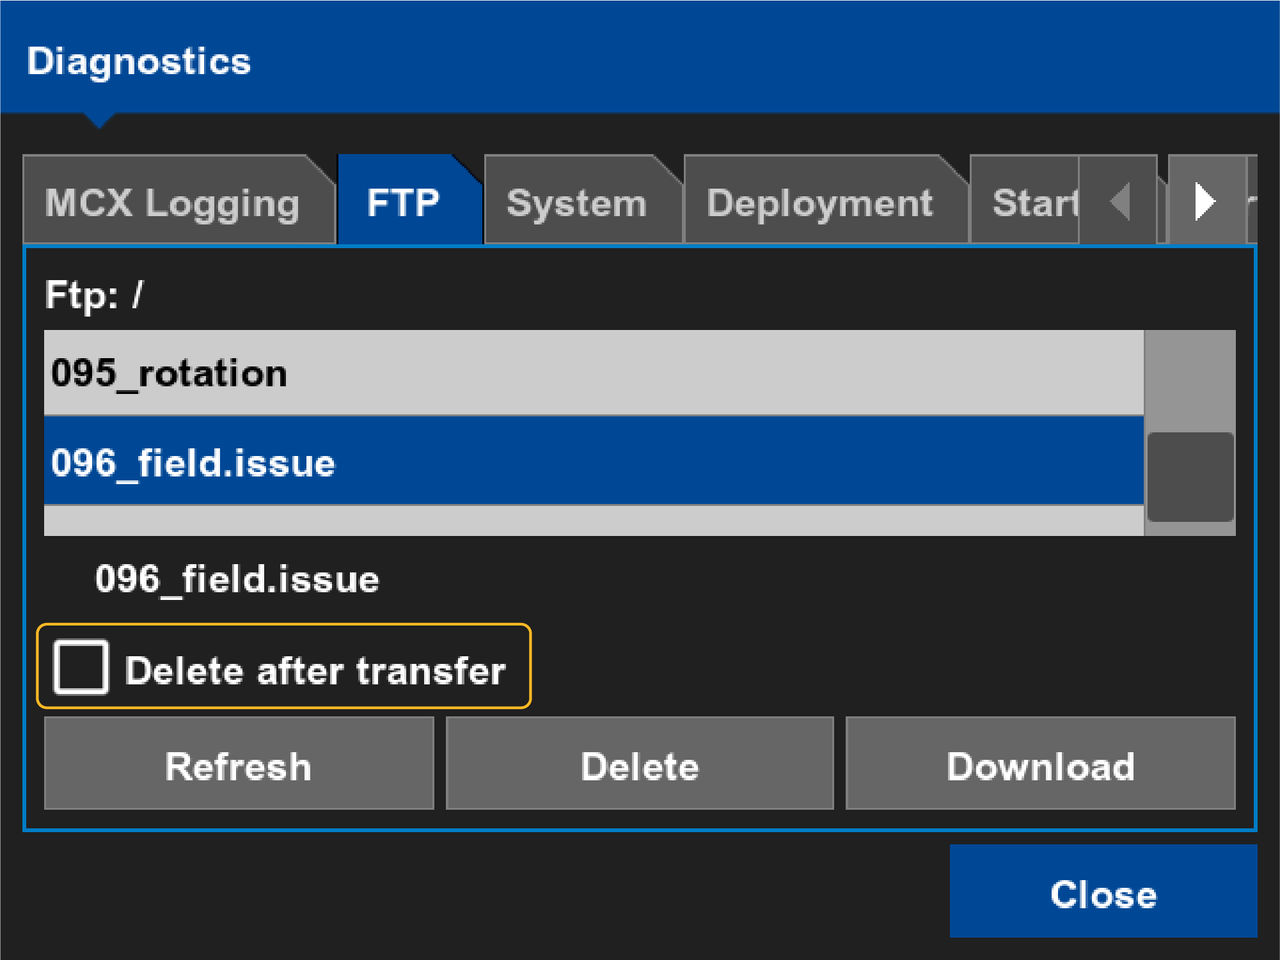 You can select where to save the file in the Download to dialog.Note:If you select Delete after transfer, the MC-X deletes the log file after the download.
 - Select OK to start the download.ADDITIONAL INFORMATION:
Figure: Download to 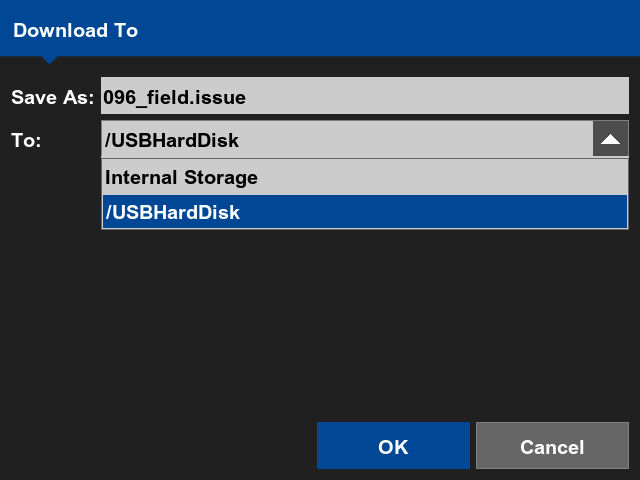 If you select Internal Storage, you can get the log file from the GX display. Select to show the location of the log file.
Figure: File location in GX display memory 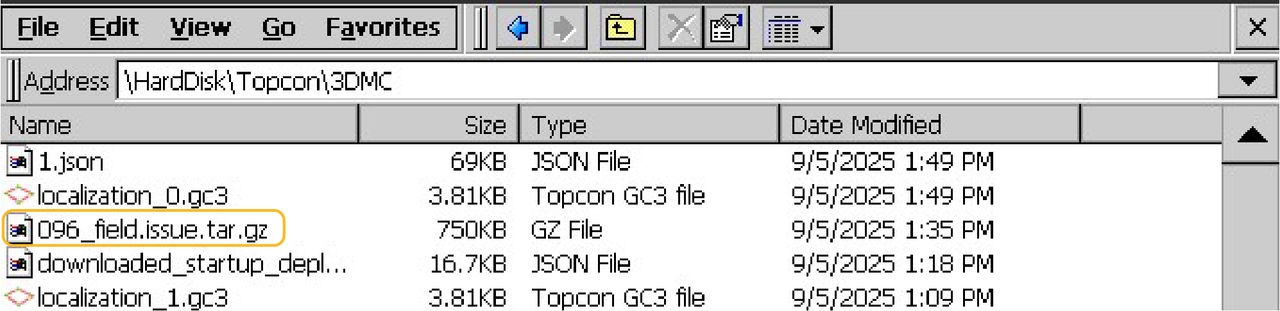
Previous:
Create log file
Next:
Stop logging
myTopcon NOW! support
Take your Topcon experience to the next level with myTopcon NOW! This platform is a self-service tool for your desktop or mobile device.