An RTK base station is a fixed GNSS receiver that transmits differential corrections to a rover for accurate positioning. Correct setup, a stable location, and clear sky visibility are necessary for operation.
An RTK base station is a GNSS receiver at a known (and fixed) position. The base station monitors the same satellites as the RTK GNSS rover receiver. The base station monitors the errors in the GNSS system. It calculates differential corrections and transmits them to the RTK rover as a message set. These messages correct the real-time positions of the GNSS rover.
You set up the base station receiver on a tripod over the base station marker. The base station, in static or post-processed kinematic occupation, records GNSS raw data. A dedicated application, for example Topcon Tools, post-processes the data.
General guidelines for HiPer XR GNSS receiver operation as a base station:
- Put the GNSS base station where it has a clear view of the sky. Do not set up the base station receiver in an area with blockage of the sky, for example, buildings or tree canopy.
- Do not set up the receiver directly below or near overhead power lines or electrical generation facilities. Electromagnetic fields can cause interference with GNSS receiver operations.
- Put the GNSS base station at a safe and stable location.
- Select the applicable radio antenna for the frequency band to transmit GNSS differential corrections.
- Make sure that the receiver battery is fully charged.
- Connect an external power supply to operate the receiver for a longer time.
- Topcon recommends that, when possible, to keep the receiver equipment dry. Although the receivers are resistant to wet weather, dry ports and connectors decreases the effects of corrosion. If the base station equipment becomes wet, use a clean dry cloth to make the equipment dry.
This is a typical base station setup with a tripod and tribrach. You install the receiver on the tribrach that is attached to the tripod.
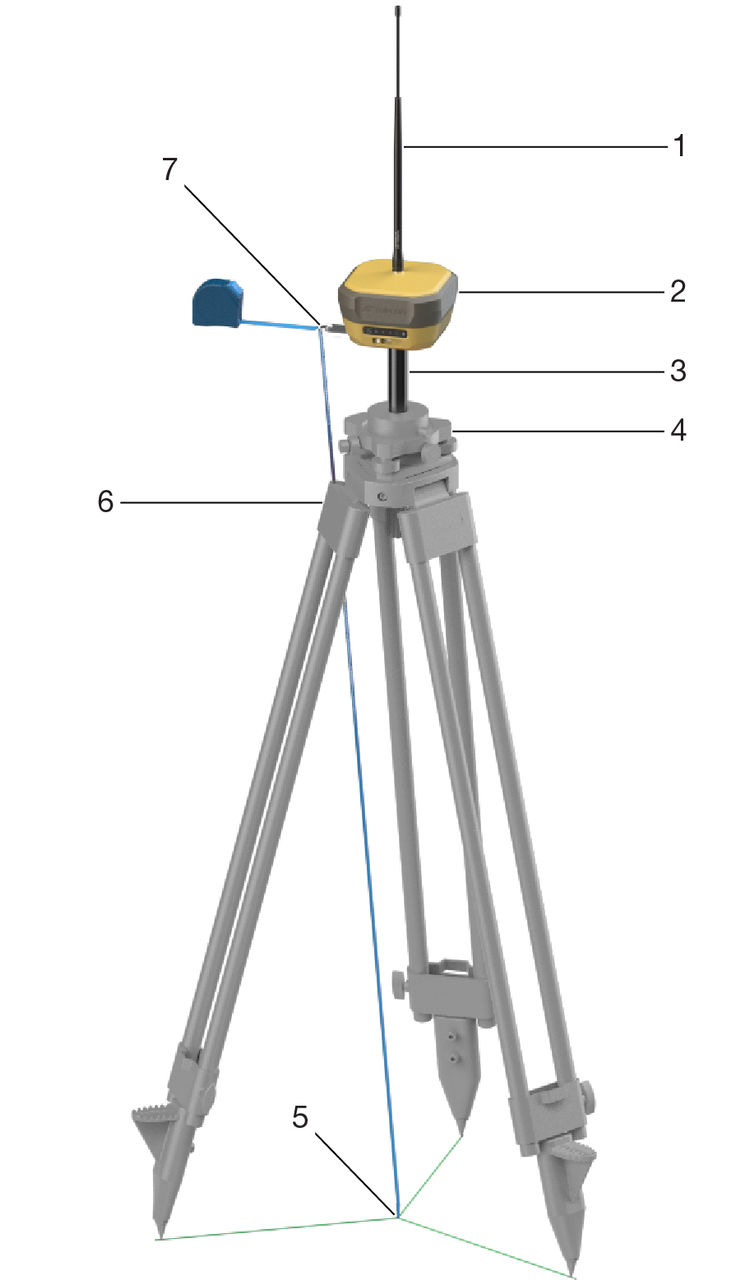
- Radio antenna
- HiPer XR GNSS receiver
- 100 mm prism spacer
- Tribrach with adapter
- Control point
- Wooden tripod
- Slant measurement height bracket
To measure the height of the base station with the slant height measurement bracket:
- Measure from the control point on the ground (5) to the slant height measurement point on the bracket (7).
- Enter the slant height measurement into the field software (or web UI).ADDITIONAL INFORMATION:You can install the base station directly on a fixed height tripod with the 5/8-11 in. threaded socket (see the figure below). The antenna reference point of the receiver is the bottom of the receiver housing. When the receiver is directly installed on the tripod, the height of the tripod is the vertical height measurement to enter in the field application software or web UI.Note: The slant measurement height bracket is not necessary when you use a fixed height tripod. See the figure below for a typical fixed height tripod setup.
Figure: Fixed height tripod base station setup vertical height 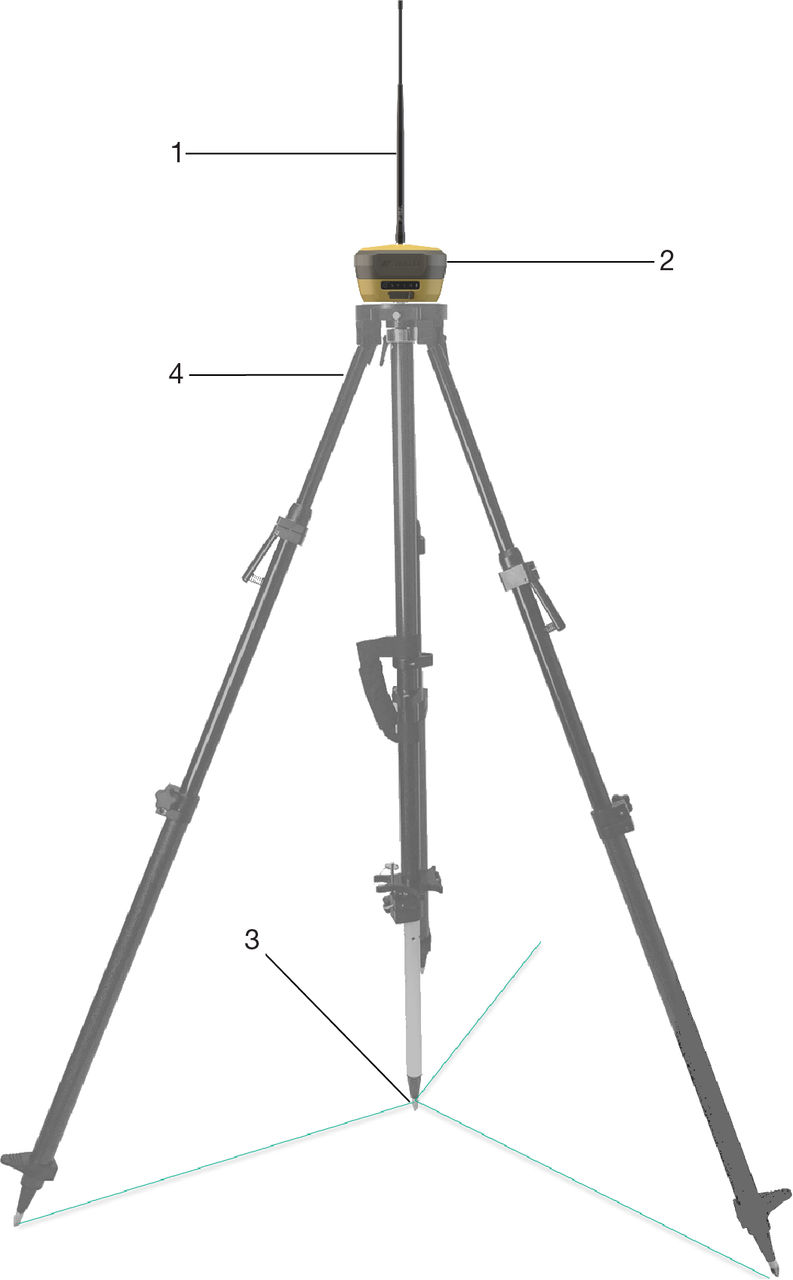
- Radio antenna
- HiPer XR GNSS receiver
- Fixed height tripod
- Control point
- Set up the HiPer XR GNSS receiver on a tripod above the control point at a safe and stable location.
- Connect the receiver to a field controller with Topcon software (Topcon Field or Pocket 3D), or to the receiver web UI.
- Configure the position of the base station and the antenna height (slant or vertical).
- Select the differential corrections message set for output.
- Select the method of transmission (Radio, LongLink, Cellular).
Previous:
Field Setup
myTopcon NOW! support
Take your Topcon experience to the next level with myTopcon NOW! This platform is a self-service tool for your desktop or mobile device.


