- Disconnect the machine power.
- Connect the positive wire to the positive battery terminal. The red wire is positive.
- Connect the negative wire to machine ground. The black wire is negative. ADDITIONAL INFORMATION:Note: Do not connect the negative wire to the negative terminal on the battery.
- Run the yellow wire to a machine-key hot fuse or wire. Topcon recommends an “add a fuse” device.ADDITIONAL INFORMATION:Note: For hitch configurations, make sure to pull loose 5 m M12 cable through the boom access panel. Use zip ties to attach it to hydraulic lines.
Figure: Key hot switched power yellow wire 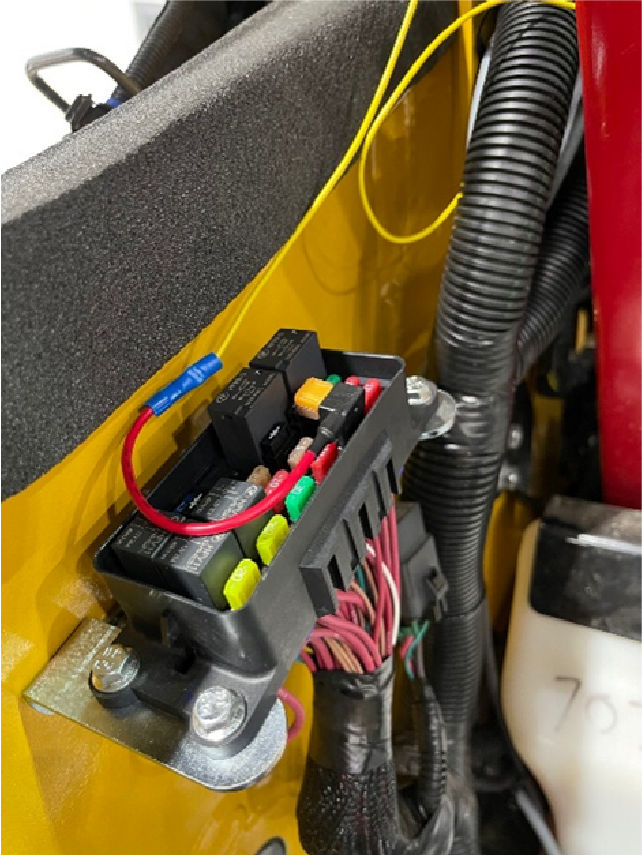
- Install the yellow wire into a fuse that shows 12 volts with the machine on and 0 volts with the machine off. Do not use a key hot fuse that is more than 10 Amps. Key hot switched power yellow wire is necessary for the MC-X1 controller to operate correctly.
- Look for areas where the cable or tees can be damaged during machine operation.
- Use zip ties for all connections to prevent possible damage or mechanical wear.
- Pull the loose 5 m M12 cable from the boom access panel. Zip-tie the M12 cable to hydraulic lines. Refer to the related topic 2D Hitch add-on installation.
- Lower the cab and make sure that there are no pinch points for the cables or tees.
- Connect the machine battery cables again.
- Start the machine.
- Unlock the boom cylinder arm lockout lever.
- Lower the boom to the machine boom stops.
- Use a wireless device to make sure that the MC-X1 controller power is on. Go to Wi-Fi settings and make sure that the MC-X1 serial number shows as an available network.
Previous:
MC-X1 controller connections
myTopcon NOW! support
Take your Topcon experience to the next level with myTopcon NOW! This platform is a self-service tool for your desktop or mobile device.