- Select PAT Blade from the Type drop-down menu.
- Select Generic PAT Blade from the Make/Model drop-down menu.ADDITIONAL INFORMATION:
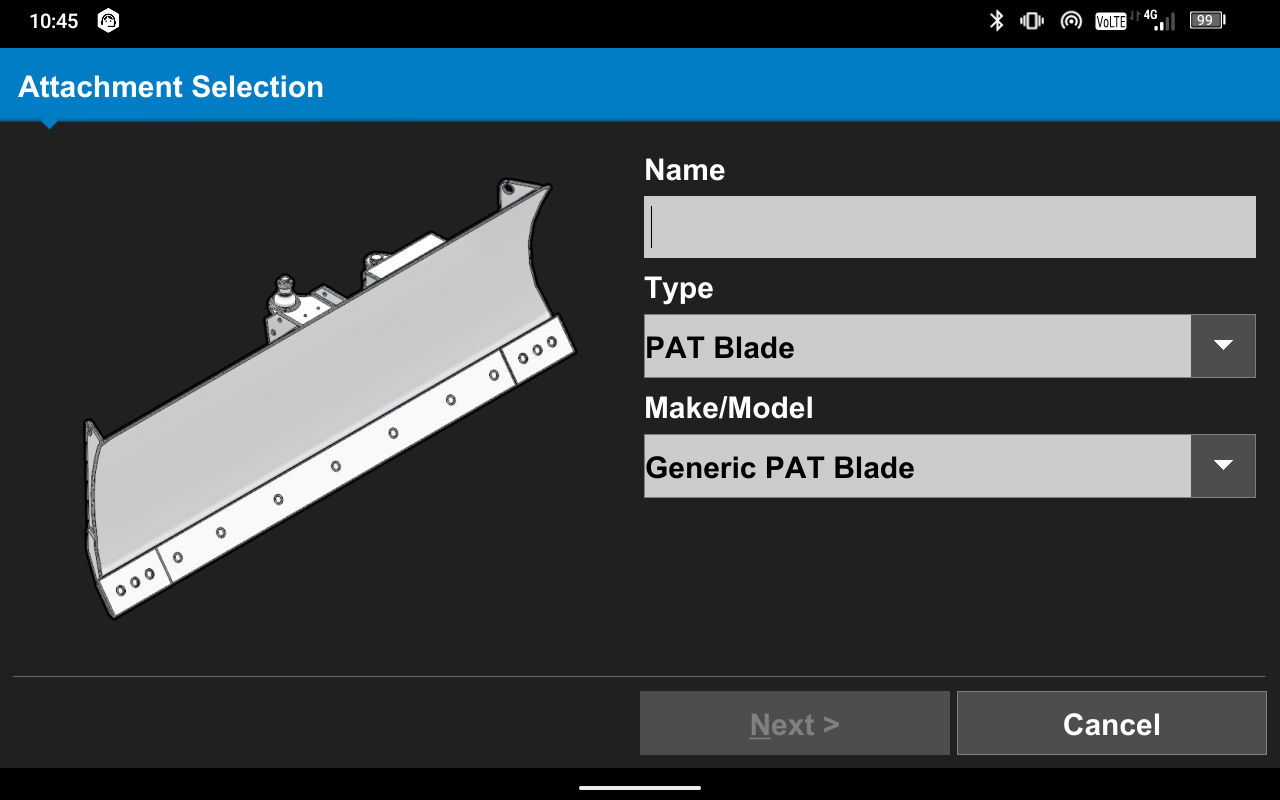
- Select Next.
- Complete the onscreen instructions to measure the right side (1) and left side (2) Blade Wear Bolt Distance.ADDITIONAL INFORMATION:
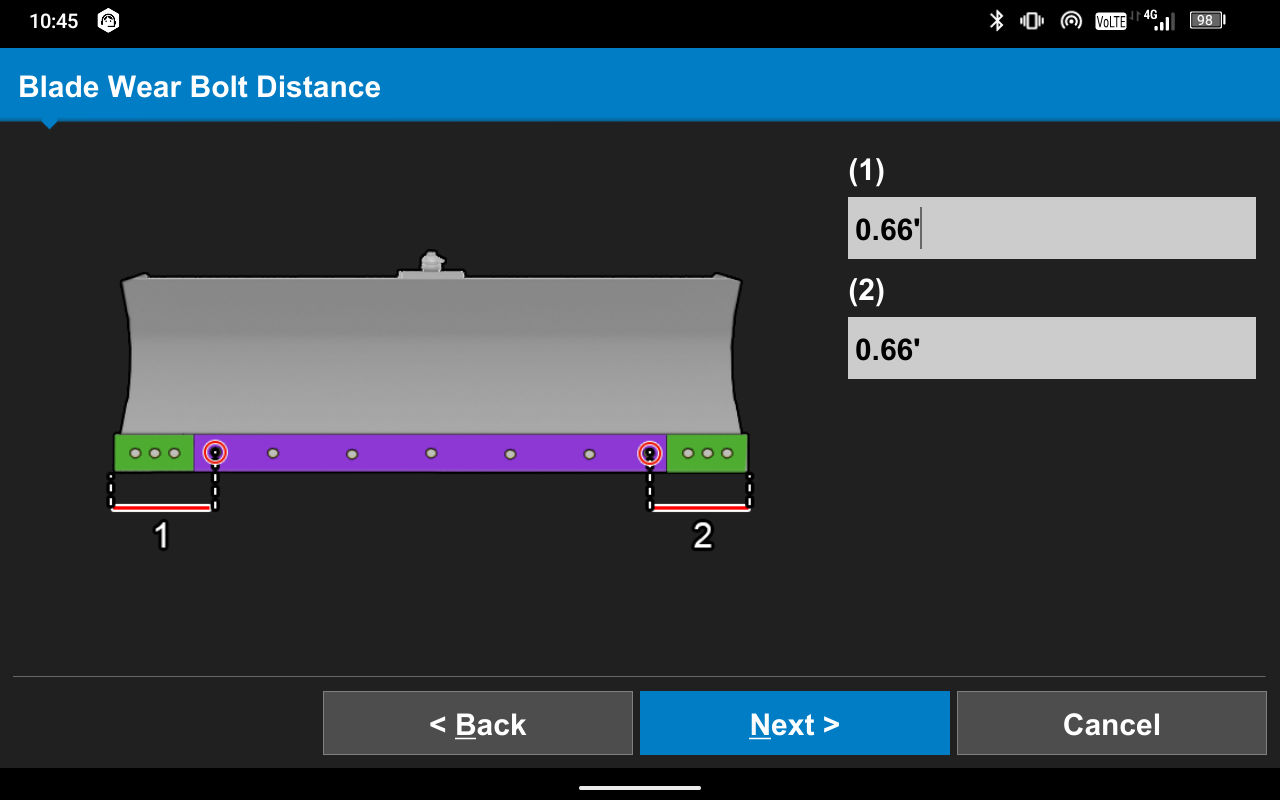
- Select Next.
- Measure from the bottom of the cutting edge to the top of the moldboard for blade Height (1).
- Measure from the bottom right blade corner to the bottom left blade corner for blade Width (2).ADDITIONAL INFORMATION:
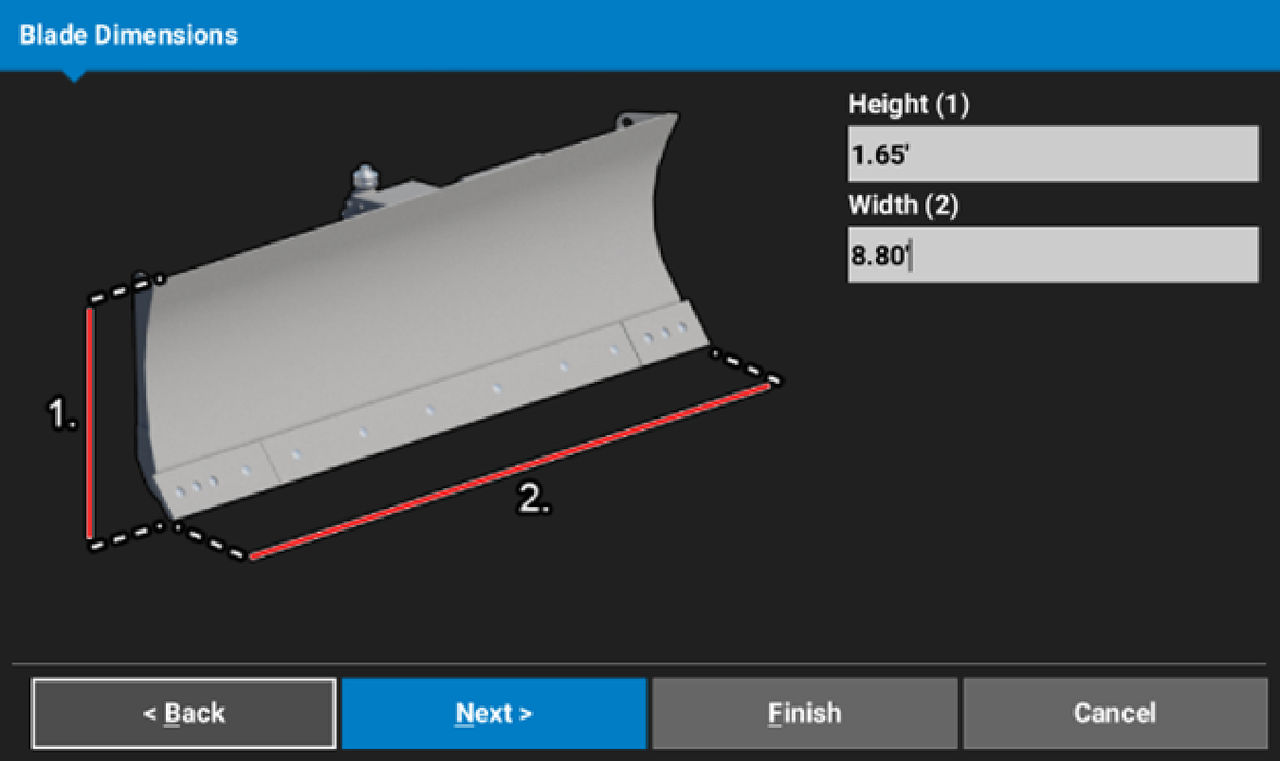
- Select Next.
- Measure Slant (1) , from the center of the bolt parallel to the cutting edge to the track plane.
- Measure Height (2) , straight up from the track plane to the center of the bolt.ADDITIONAL INFORMATION:
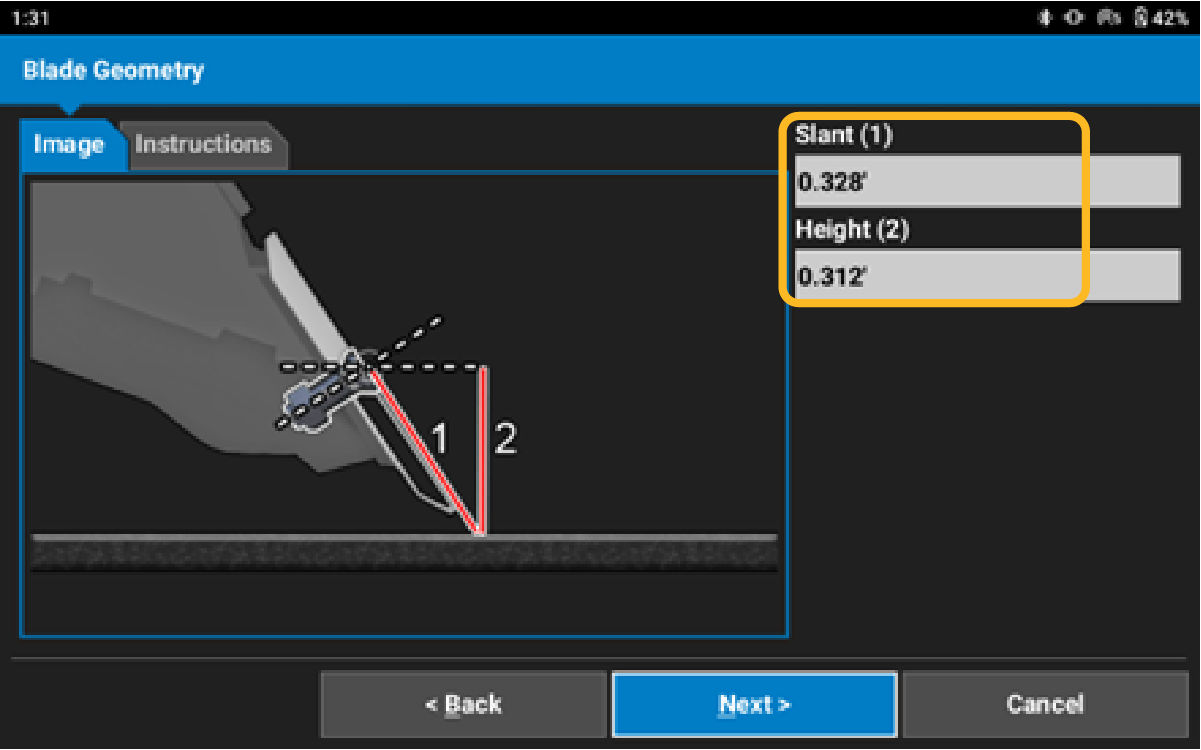
- Select Next.
- Assign the TS-i4 Blade sensor. Select the Sensor ID drop-down menu. Use the recorded information from the installation. Select the Sensor ID.
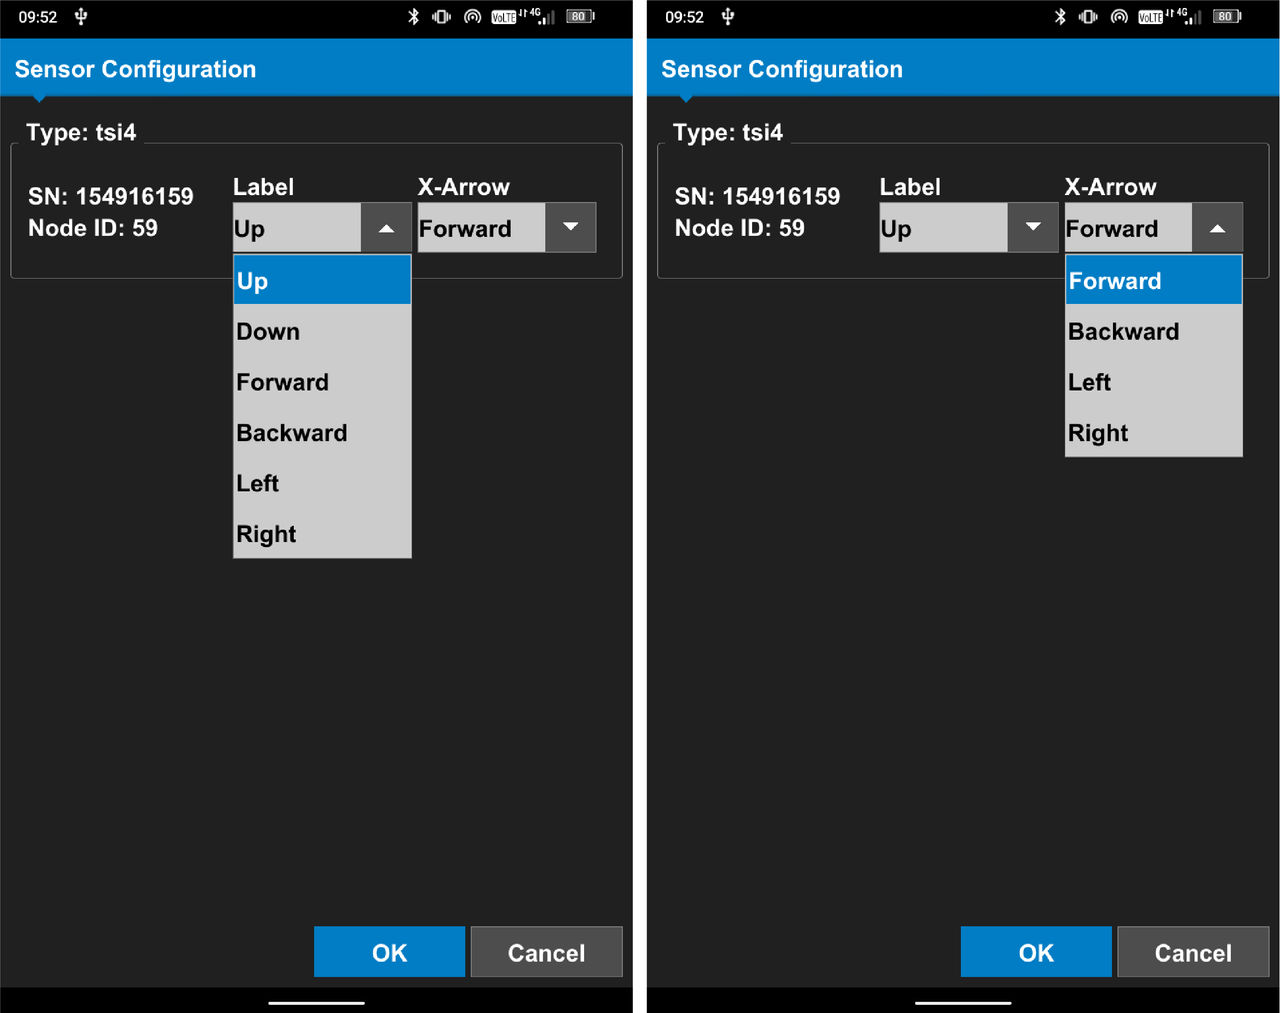
- Select the Wrench icon and select the TS-i4 Blade sensor IMU orientation., then select OK.ADDITIONAL INFORMATION:
 ADDITIONAL INFORMATION: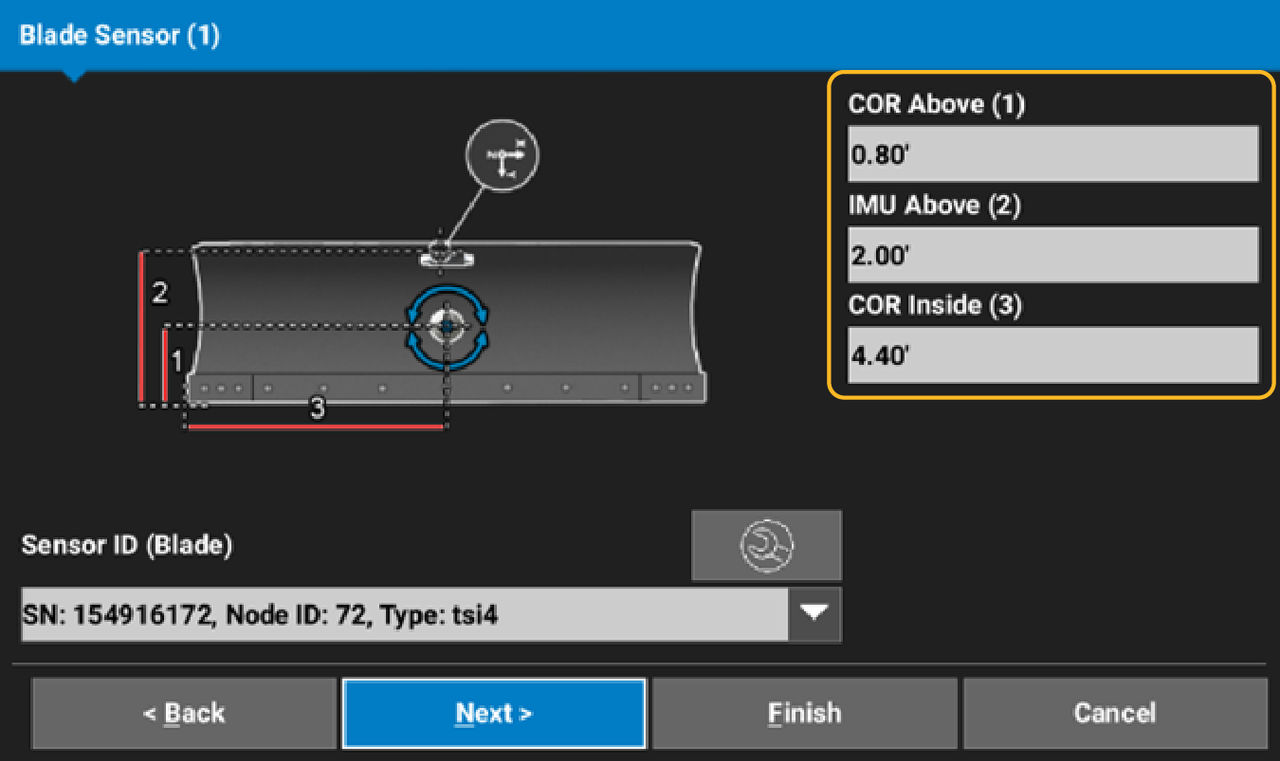
- Measure COR Above (1) , from the track plane to the center of the blade rotation point.
- Measure IMU Above (2) , from the track plane to the center of the IMU crosshair.
- Measure COR Inside (3), from the right blade corner to the center blade rotation point.ADDITIONAL INFORMATION:
- Select Next.
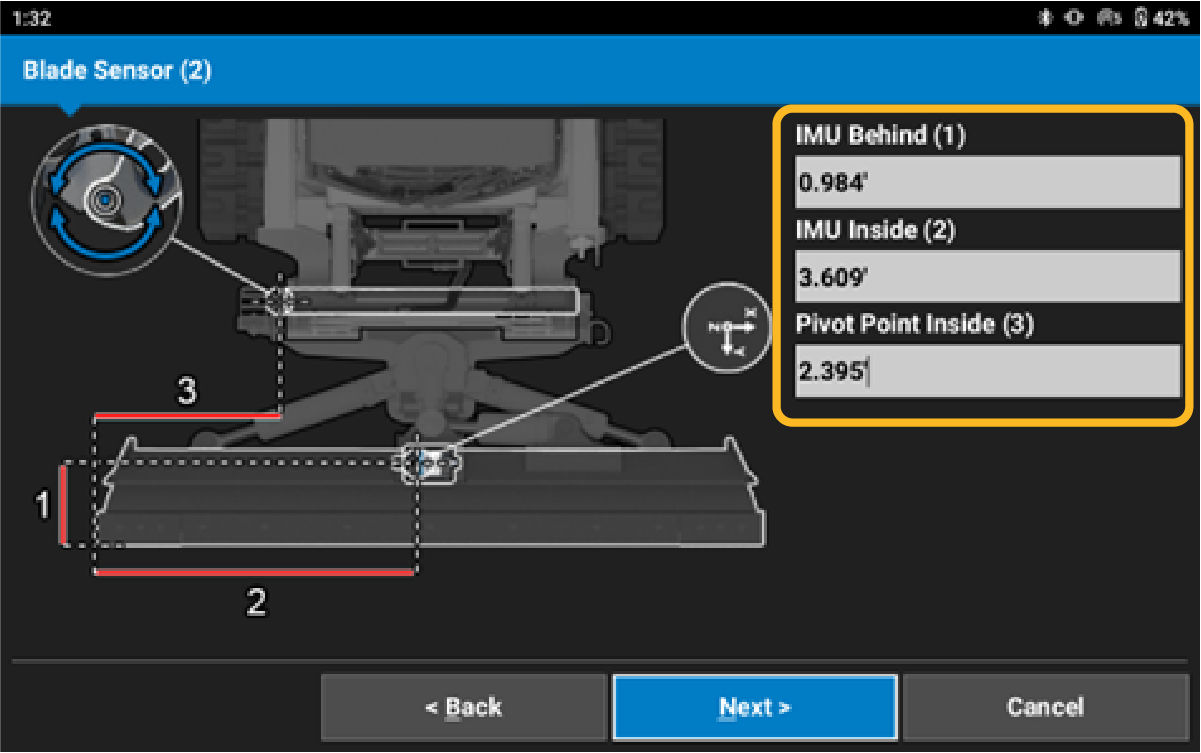
- Measure IMU Behind (1), from the cutting edge to the center of the IMU crosshair.
- Measure IMU Inside (2), from the right side blade corner to the center of the IMU crosshair.
- Measure Pivot Point Inside (3), from the right side blade corner to the center of the right side hitch plate pivot pin.ADDITIONAL INFORMATION:
- Assign the TS-i4 Hitch sensor by selecting the Sensor ID drop-down menu. Use the recorded information from the installation. Select the Sensor ID.
- Select the Wrench icon and select the TS-i4 Hitch sensor orientation.ADDITIONAL INFORMATION:
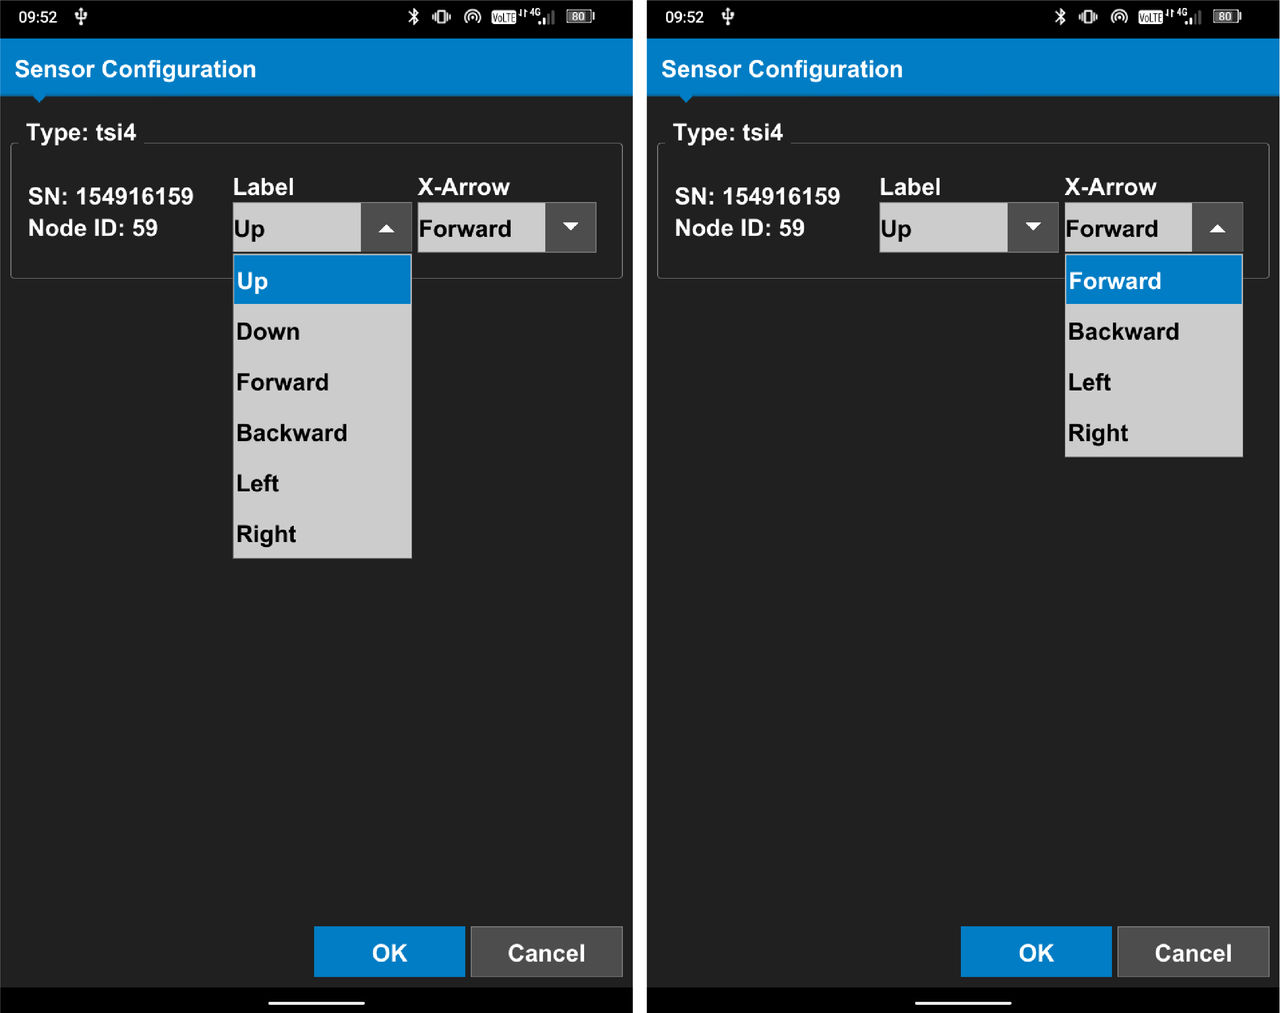
- Select OK. ADDITIONAL INFORMATION:

- Measure from the center of the right side hitch pivot pin to the center of the IMU crosshair for IMU Above (1) measurement.
- Measure from the center of the right side hitch plate pivot pin to the center of the IMU crosshair for IMU Inside (2) measurement.
- Measure from the center of the right side hitch plate pivot pin to the center of the IMU crosshair for IMU Behind (3) measurement. ADDITIONAL INFORMATION:Note: The TS-i4 Hitch sensor is usually behind the hitch plate pivot pin, but some machines have it a bit forward. If the TS-i4 Hitch sensor is forward of the pitch plate pivot pin, enter a measurement with a negative value.
- Select Next.
- Select Next.
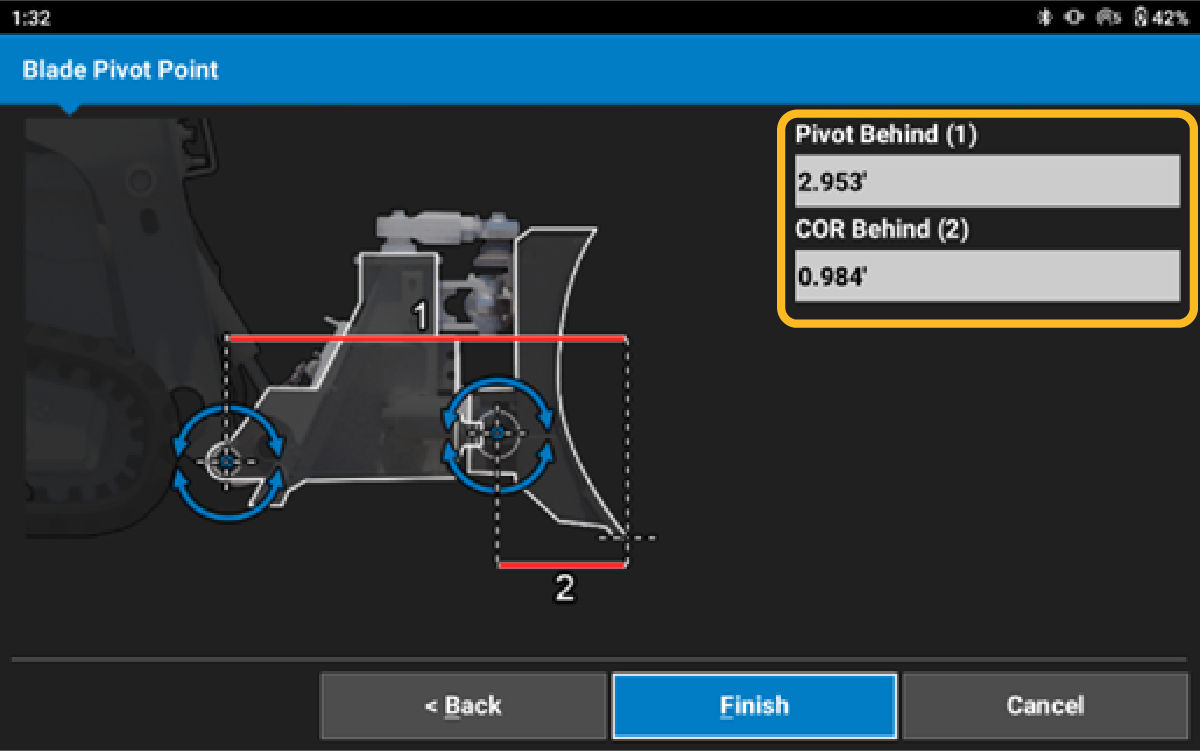
- Measure Pivot Behind (1), from the cutting edge to the right side hitch plate pivot pin.
- Measure COR Behind (2), from the cutting edge to the blade center of rotation.ADDITIONAL INFORMATION:
- Select Finish.
- Select to set as Active Attachment or not.
- Continue to do the IMU calibration. Refer to the related topic for instructions.
myTopcon NOW! support
Take your Topcon experience to the next level with myTopcon NOW! This platform is a self-service tool for your desktop or mobile device.