You can use the Control menu to activate the Boundary Limit in 3D-MC. This makes sure that CO-PILOT conditions are correct. Symbols indicate active Swing, Height, and Depth limit settings.
- Select to make Boundary Limit active in 3D-MC.ADDITIONAL INFORMATION:
Figure: Boundary limits on Control menu 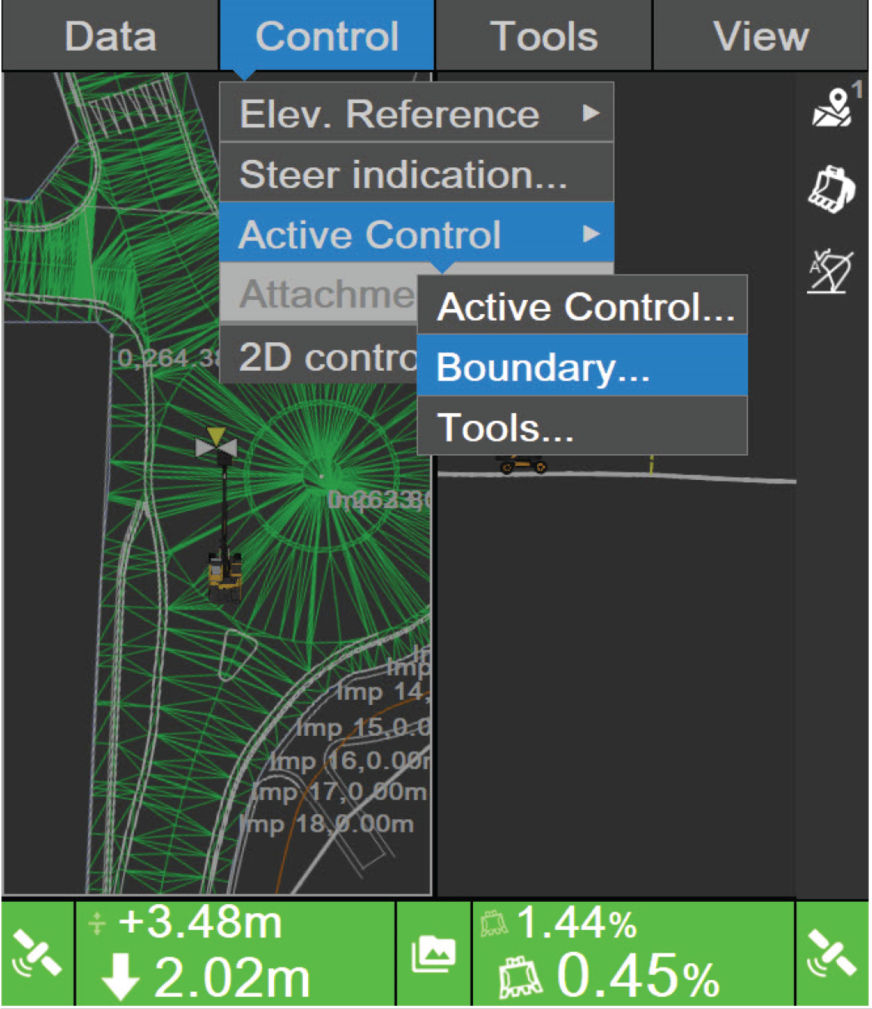 The Active Control screen opens. There are three Boundary Limit settings: Swing, Height, and Depth.
 - Always make sure that these CO-PILOT conditions are correct when Boundary Limit is active:ADDITIONAL INFORMATION:
- The Boundary Limit symbols show correctly.
- There are no error messages.
- You do not hear a warning sound.
- There is no orange shading on the sides of the main screen when the attachment gets near the target line.
ADDITIONAL INFORMATION:The Boundary Limit symbols show at the top left of the status bar when Boundary Limit is active. These symbols change with the active limit function.ADDITIONAL INFORMATION:Figure: Boundary Limit 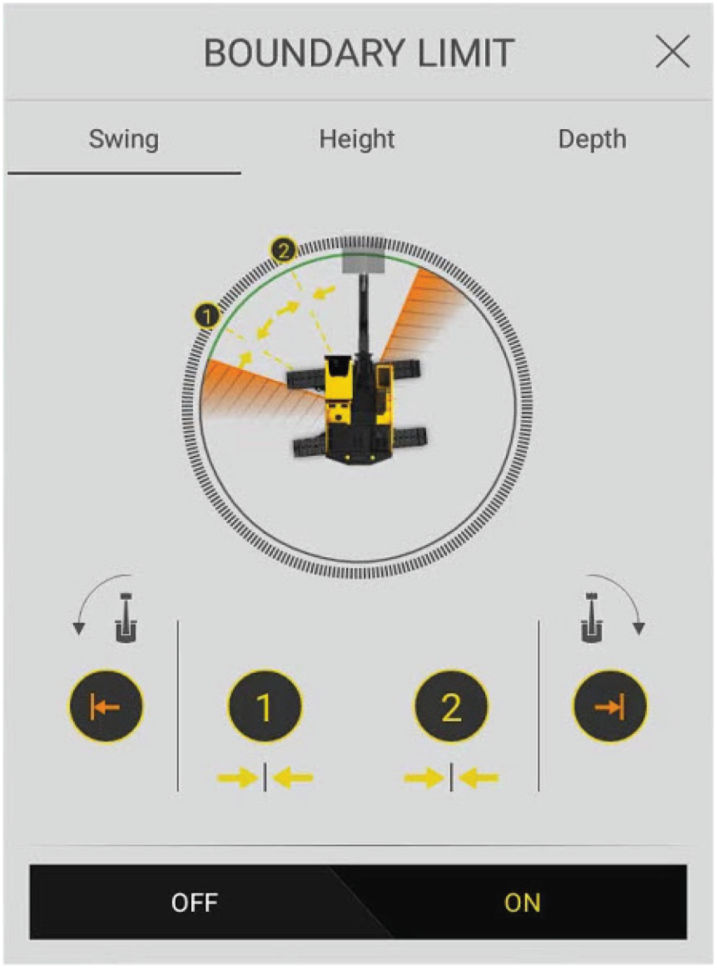
Figure: Boundary Limit Symbols 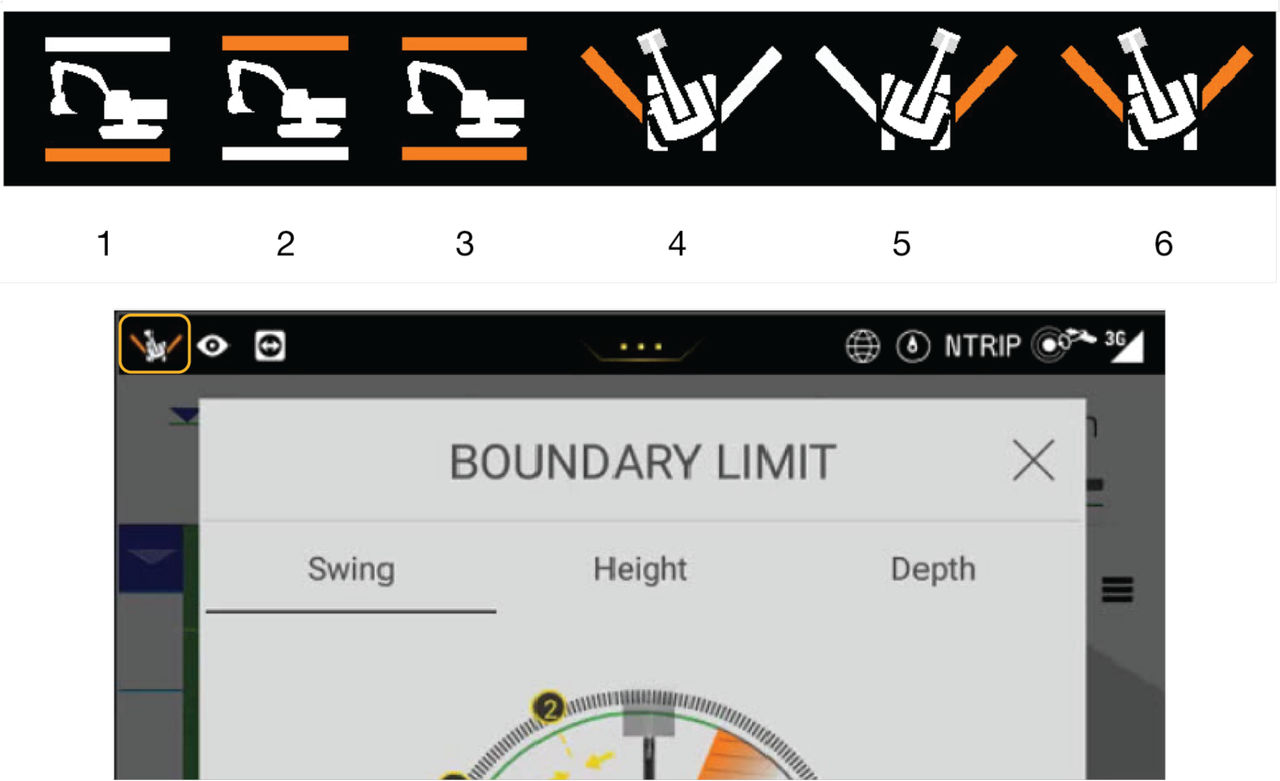
- Depth Limit Activated
- Height Limit Activated
- Depth and Height Activated
- Left Swing Fence Activated
- Right Swing Fence Activated
- Left and Right Swing Fence Activated
Previous:
Boundary
Next:
Boundary limit options
myTopcon NOW! support
Take your Topcon experience to the next level with myTopcon NOW! This platform is a self-service tool for your desktop or mobile device.