- Select .ADDITIONAL INFORMATION: the Surfaces screen opens.
- Select New to make a new flat or sloping surface file.ADDITIONAL INFORMATION: The Surface Name and Type screen opens.
- Enter a name for the surface file.
- Select Sloping plane surface, then select Next.ADDITIONAL INFORMATION:
Figure: Project surfaces screen – new slope plane surface 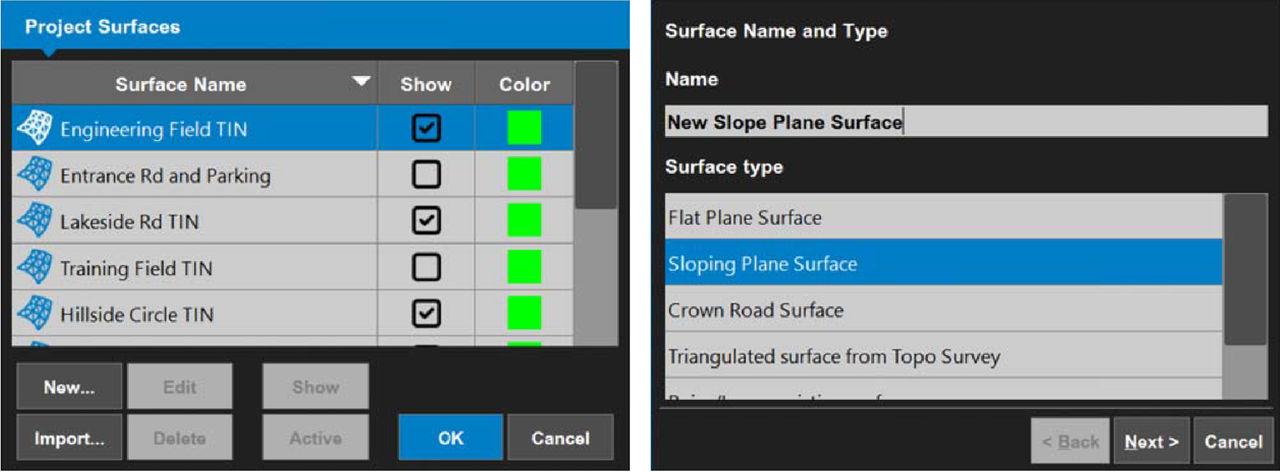 The Sloping Plane Surface screen opens.
 - There are three methods to enter the direction and mainfall grade:ADDITIONAL INFORMATION:
- Enter the direction and grade manually.
- Select Measure Points.
- Select Points to select existing points for A and B.
For information about how to enter direction and mainfall grade, refer to Enter direction and mainfall grade. - Select Finish to go back to the Surfaces screen.ADDITIONAL INFORMATION:
Figure: Sloping plane surface 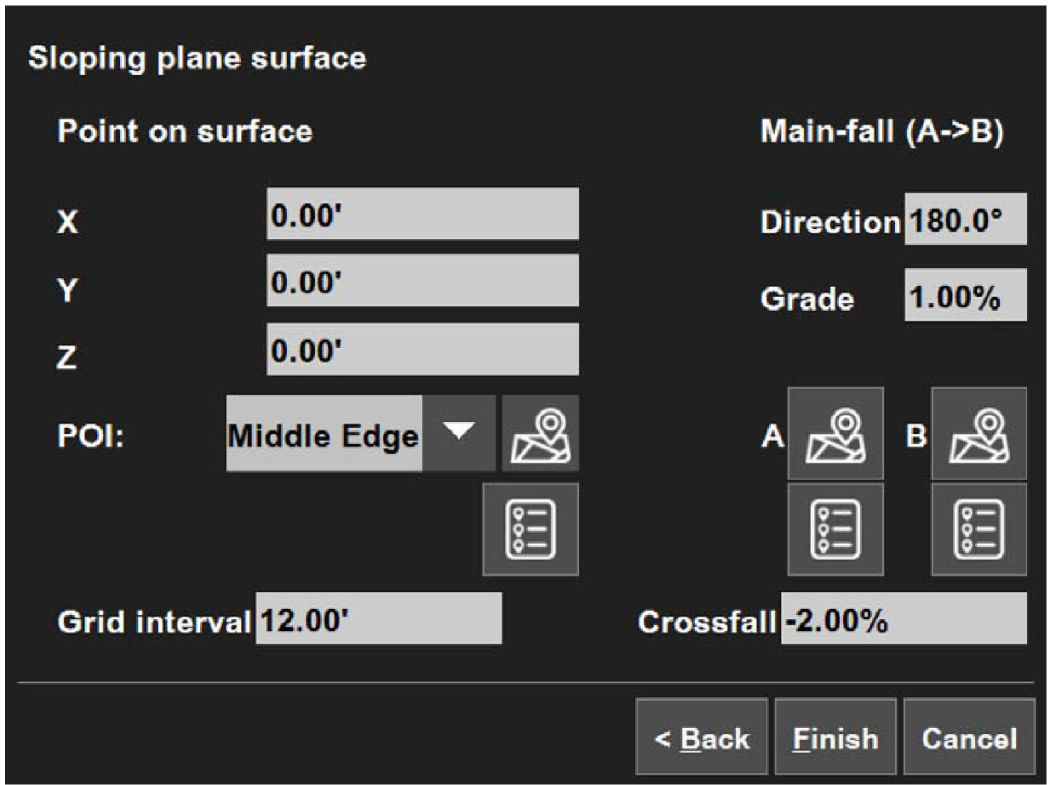
- Select OK.
- Select Yes to set the new surface as active, or select No to make it inactive.ADDITIONAL INFORMATION: The main screen opens.
Previous:
Create flat surface files
myTopcon NOW! support
Take your Topcon experience to the next level with myTopcon NOW! This platform is a self-service tool for your desktop or mobile device.