- Select .ADDITIONAL INFORMATION:The Project Surfaces screen opens.
- Select New.
- Enter a name and select Subgrade of Existing Alignment.
- Select Next.ADDITIONAL INFORMATION:
Figure: Surfaces screen - sub-grade existing alignment 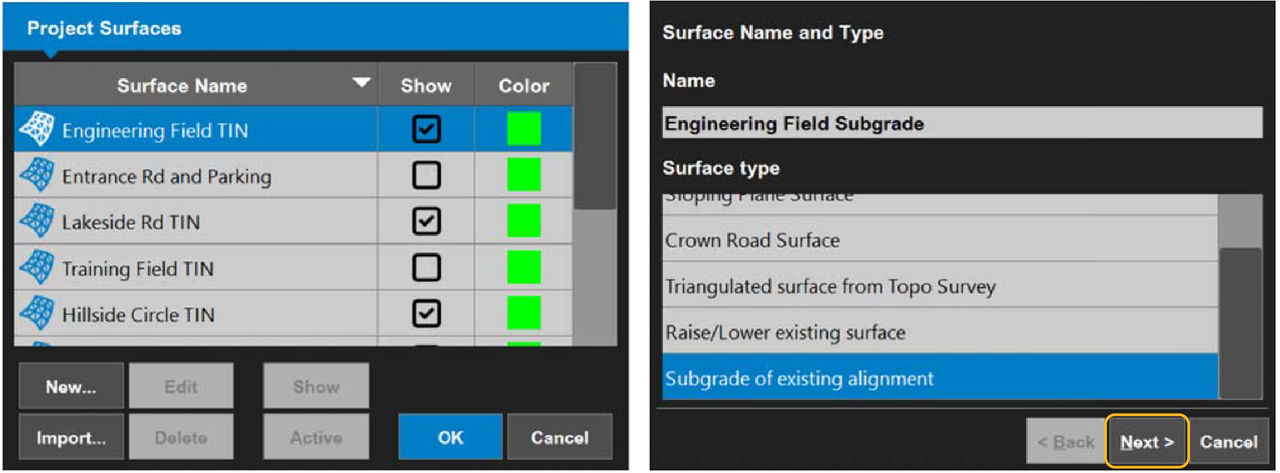 The Sub-grade of Existing Alignment screen opens.
 - Select a reference road surface to use to make the surface.
- Enter the value for the existing surface for Elevation adjustment:ADDITIONAL INFORMATION:
- A positive number raises the grade relative to the working/reference surface. This is applied to the centerline of the working/reference surface.
- A negative number lowers the sub-grade relative to the working/reference surface. This is applied to the working/reference surface.
- Select a Grade type:ADDITIONAL INFORMATION:
Sub-Grade of Existing Alignment Types Grade TypeProcessManualEnter the percentage of the Left/Right side of the sub-grade element. This determines the slope for the left/right side of the machine or the road.Copy fromUse the gradient (grade) of the reference cross-section element that matches the entered offset value (lateral offset from centerline). The left/right grade is copied from the existing road. Select a value for Extend slope.VerticalThe cross-section of the sub-grade stops at the same horizontal offset as the cross-section of the reference surface.ContinueThe last element of both surfaces selected in the Maximum extension field is continued. Use this if there are more intersection points possible after the end of the cross-section. - Select Finish to save the new surface file and return to the Surfaces screen.ADDITIONAL INFORMATION:
Figure: Select or enter the subgrade values 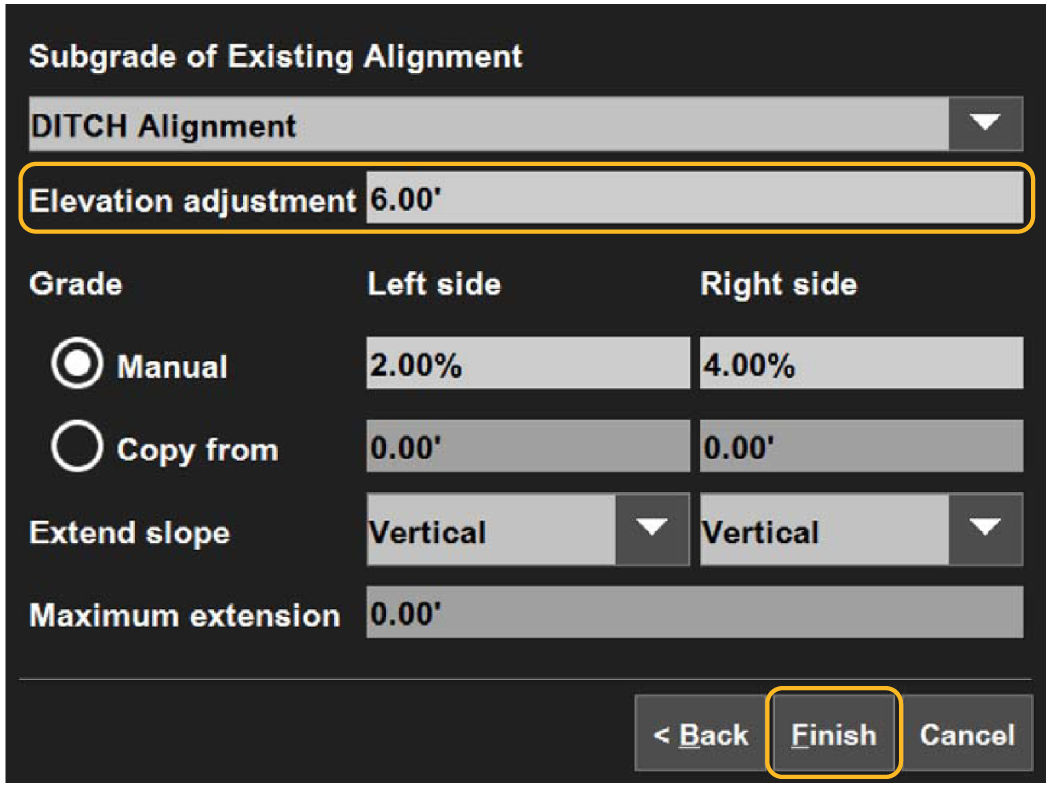
- Select OK.
- Select Yes to set the new surface as active, or select No to make it inactive.ADDITIONAL INFORMATION:The main screen opens.
- Select OK.
- Select Yes to set the new surface as active, or select No to make it inactive.ADDITIONAL INFORMATION:The main screen opens.
Previous:
Raise or lower an existing surface
Next:
Select an active surface
myTopcon NOW! support
Take your Topcon experience to the next level with myTopcon NOW! This platform is a self-service tool for your desktop or mobile device.